Whirlpool W11535094 Dishwasher Water Inlet

Special Price $31.41 Regular Price $43.35
In stock
Available Quantity:   20
SKU
W11535094

Product Description

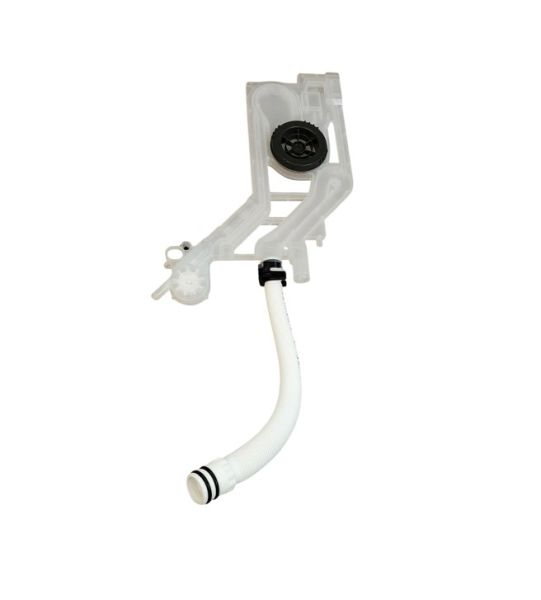
The Whirlpool W11535094 Water Inlet is used to maintain the dishwasher’s performance. This valve regulates the amount of water that enters the dishwasher and fills up with the right amount of water for each wash cycle. Operate to open and close and control the water inlet at the correct time and use the valve to solve the inlet valve problem, which can cause leakage and affect the usage of water effectively cleaning.
Manufacturer
✓ This Product Replaces: W11407411
https://www.hnkparts.com/media/catalog/product/w/1/w11535094-54903.jpg
Manufacturer Name: WHIRLPOOL
Product Number: W11535094
OEM Part Number: W11535094
Product Description: Inlet-Watr

Choose the best Home Appliance parts and supplies from HnKParts!

  • Same Day Shipping

  • Best Quality And Best Price

  • Wide Range of Inventory

  • Best Customer Service

Have More Questions or Need Help to Place The Order?
Reach us at (866)723-0907 or [email protected]

Write Your Own Review
You're reviewing:Whirlpool W11535094 Dishwasher Water Inlet
Your Rating
Customer Questions
What maintenance is required for the Whirlpool W11535094 Water Inlet?

Ensure connections are secure and free from debris. Clean inlet screens to maintain consistent water flow. Test operation periodically to confirm proper opening and closing. Monitor fill cycles for steady performance and accurate water levels.

What are common issues with the Whirlpool W11535094 Water Inlet?

  • Water filling slower than expected.
  • Valve opening intermittently.
  • Cycles delayed due to insufficient water.
  • Uneven water distribution.

Installation Steps

Step1: Turn off the dishwasher and shut off the main water supply.

Step2: Disconnect the existing water inlet hose carefully.

Step3: Attach the new water inlet valve securely to the dishwasher.

Step4: Connect the water supply line and tighten fittings to prevent leaks.

Step5: Turn on water and check for proper flow and leaks.

Step6: Restore power and run a short cycle to confirm proper operation.