The store will not work correctly in the case when cookies are disabled.
We collect user information to provide a better user experience and protect the security of our website. By continuing to use our website, you acknowledge the use of cookies.
In the Observance of Memorial Day No Shippings or Deliveries on Monday, 05/25. Second day air orders on 05/21 and next day air orders on 05/22 will be delivered on Tuesday, 05/26.
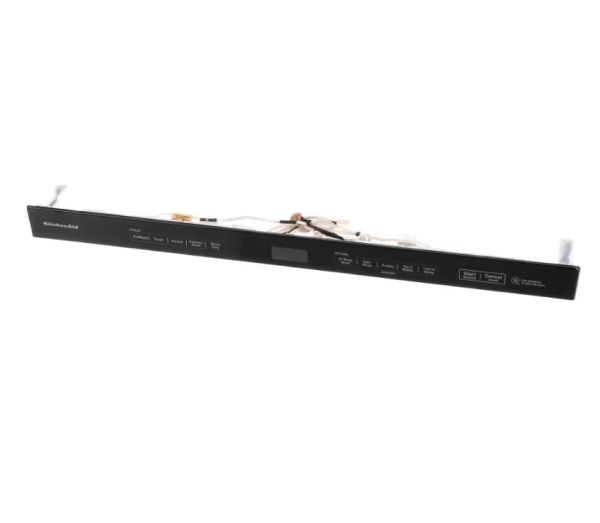
The Whirlpool W11416459 Dishwasher Control Panel is the peak of innovation in kitchen equipment. This sleek and intuitive control panel revolutionizes the dishwashing experience, providing consumers with unsurpassed convenience and efficiency. Designed to simplify operation, it allows users to select wash cycles, alter settings, and track progress with astonishing ease. Whether dealing with difficult stains or fragile glassware, its control panel maintains peak performance for every load, delivering sparkling results every time. Its easy-to-use interface appeals to both experienced and inexperienced users, simplifying the dishwashing procedure while increasing effectiveness. With cutting-edge technology and an easy design, the Whirlpool W11416459 Dishwasher Control Panel transforms kitchen cleanup, saving time and effort for busy families.
Step 1: The appliance should be disconnected from the power source prior to initiating the replacement.
Step 2: The new console should be positioned and fastened in place utilizing screws.
Step 3: The electrical and air supply lines should be linked to the main unit.
Step 4: The wiring harness should be reattached and electrical tape should be utilized as required.
Step 5: The console should be firmly attached to the main unit using the supplied mounting clips.
Step 6: The vent tubing should be replaced and the appliance should be reconnected to its power source.
Step 7: It should be verified that all components are properly positioned, with adjustments made if needed.
Step 8: The repair should be concluded by conducting tests on the product to verify successful installation.
Step 9: All screws should be ensured securely fastened and sealant should be applied to effectively bond all joints as necessary.
Step 10: The completed work should be documented to facilitate more efficient future service.
Please remember, these instructions should be served as general guidance and should always be referenced alongside the manufacturer's manual, if available.