
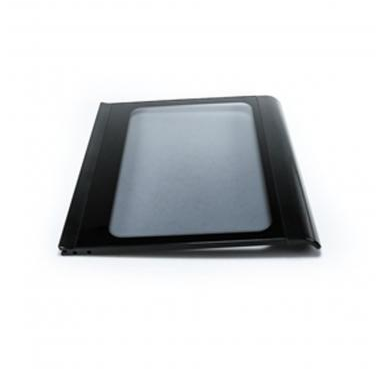
Whirlpool W11413336 Washer Lid Assembly

Special Price $292.36 Regular Price $317.95
Out of stock
Available Quantity:   0
SKU
W11413336

Product Description

The Whirlpool W11413336 Washer Lid Assembly is designed to function through interacting with the locking mechanism of the washer and the cycles will only operate when the lid is closed. It is made to suit a particular model and ensures that it closes securely and smoothly to enhance its functionality. The design also ensures safety by avoiding any chances of opening during its use because it is tightly sealed and also minimizes on the noise and vibrations.
Manufacturer

https://www.hnkparts.com/media/catalog/product/w/1/w11413336_whirlpool_hnkparts.png
Manufacturer Name: WHIRLPOOL
Product Number: W11413336
OEM Part Number: W11413336
Product Description: Lid

Choose the best Home Appliance parts and supplies from HnKParts!

  • Same Day Shipping

  • Best Quality And Best Price

  • Wide Range of Inventory

  • Best Customer Service

Have More Questions or Need Help to Place The Order?
Reach us at (866)723-0907 or [email protected]

Write Your Own Review
You're reviewing:Whirlpool W11413336 Washer Lid Assembly
Your Rating
Customer Questions
What maintenance is required for the Whirlpool W11413336 Lid Assembly?

Regularly clean the washer lid surface and hinges to prevent buildup of detergent residue and debris. Inspect the lid for cracks or loose fittings to ensure proper sealing and operation. Avoid slamming the lid to prevent hinge damage. Ensure safe handling when cleaning to avoid damage.

What are common issues with the Whirlpool W11413336 Lid Assembly?

  • Lid not closing or latching properly.
  • Cracks or damage to the lid structure.
  • Loose or worn hinges affecting alignment.
  • Washer not starting due to lid switch misalignment.
  • Unusual noise when opening or closing the lid.

Installation Steps

Step1: Unplug the washer and turn off the water supply for safety.

Step2: Open the top panel or remove screws securing the old lid.

Step3: Disconnect any attached hinges or lid switch connections.

Step4: Align the new lid assembly in place.

Step5: Secure hinges and reconnect any wiring.

Step6: Reattach screws, close the panel, and test operation before use.