
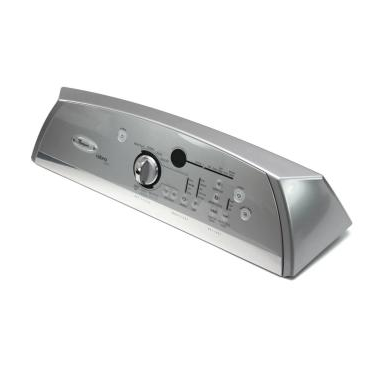
Whirlpool W11384512 Dryer Console

Special Price $277.93 Regular Price $299.95
In stock
Available Quantity:   42
SKU
W11384512

Product Description

The Whirlpool W11384512 Console provides simple control of the dryer functions and increase the convenience of washing clothes. This allows the user to choose the temperature, length of the drying cycle and the type of fabric that is being dried. It functions in such a way that it relays the commands of the user to the system of the dryer and facilitates the accurate completion of the selected cycles.
Console,
Manufacturer
https://www.hnkparts.com/media/catalog/product/w/1/w11384512_whirlpool_hnkparts.png

This Part Fits the Following Models (3)

Manufacturer Name: WHIRLPOOL
Product Number: W11384512
OEM Part Number: W11384512
Product Description: Console+Core

Choose the best Home Appliance parts and supplies from HnKParts!

  • Same Day Shipping

  • Best Quality And Best Price

  • Wide Range of Inventory

  • Best Customer Service

Have More Questions or Need Help to Place The Order?
Reach us at (866)723-0907 or [email protected]

Write Your Own Review
You're reviewing:Whirlpool W11384512 Dryer Console
Your Rating
Customer Questions
What maintenance is required for the Whirlpool W11384512 Console?

Regularly check and wipe down the dryer console to remove dust and debris. Ensure buttons and dials function smoothly. Inspect for loose connections or worn wiring, and avoid using harsh chemicals that could damage the surface.

What are common issues with the Whirlpool W11384512 Console?

  • Unresponsive or sticky buttons and dials.
  • Display panel flickering or failing.
  • Erratic or incorrect cycle dryer settings.
  • Loose or broken console connections affecting operation.

Installation Steps

Step1: Unplug the dryer from the electrical outlet before starting.

Step2: Remove the screws securing the top panel or console housing to access the control area.

Step3: Disconnect the wire harnesses from the old console, noting their locations for reassembly.

Step4: Remove the mounting screws or clips and lift off the old console.

Step5: Position the new console, secure it with the original hardware, and reconnect all wire harnesses.

Step6: Reassemble the dryer, restore power, and test the controls and display to confirm proper operation.
