
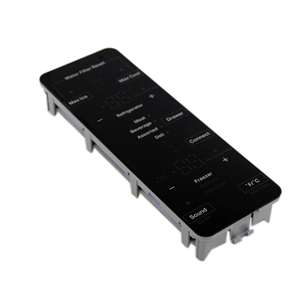
Whirlpool W11262313 Refrigerator User Interface Panel

Special Price $145.11 Regular Price $162.95
In stock
Available Quantity:   25
SKU
W11262313

Product Description

The Whirlpool W11262313 Refrigerator User Interface Panel operates based on a digital display that reacts to user input to operate temperature and mode selections. It is mounted to the inner control part of the refrigerator. The settings are displayed in a clear screen in this panel and various functions can be accessed by touch navigation. It is placed in the front inner part and is connected to the refrigerator wiring to be connected to the main control system.
Manufacturer

https://www.hnkparts.com/media/catalog/product/w/1/w11262313_whirlpool_hnkparts.png
Manufacturer Name: WHIRLPOOL
Product Number: W11262313
OEM Part Number: W11262313
Product Description: Panel-Ui

Choose the best Home Appliance parts and supplies from HnKParts!

  • Same Day Shipping

  • Best Quality And Best Price

  • Wide Range of Inventory

  • Best Customer Service

Have More Questions or Need Help to Place The Order?
Reach us at (866)723-0907 or [email protected]

Write Your Own Review
You're reviewing:Whirlpool W11262313 Refrigerator User Interface Panel
Your Rating
Customer Questions
What maintenance is required for the Whirlpool W11262313 User Interface Panel?

Regularly wipe the refrigerator panel with a soft, damp cloth to remove fingerprints and spills. Avoid chemicals that may damage the touch interface. Ensure buttons remain responsive and check connections intermittently for secure fit, preventing operational issues.

What are common issues with the Whirlpool W11262313 User Interface Panel?

  • Unresponsive or sticky buttons.
  • Incorrect temperature readings.
  • Display flickering or dimming.
  • Panel not registering inputs properly.

Installation Steps

Step1: Turn off power refrigerator at breaker and unplug unit for safety.

Step2: Remove dispenser or control panel cover carefully.

Step3: Disconnect wiring harness carefully and note connections.

Step4: Remove faulty old interface panel from housing.

Step5: Align and install new user interface panel into mounting clips securely.

Step6: Reconnect wiring harness securely and ensure tight fit.

Step7: Reassemble cover and restore power after inspection.

Step8: Test all controls and display for proper function.