The store will not work correctly in the case when cookies are disabled.
We collect user information to provide a better user experience and protect the security of our website. By continuing to use our website, you acknowledge the use of cookies.
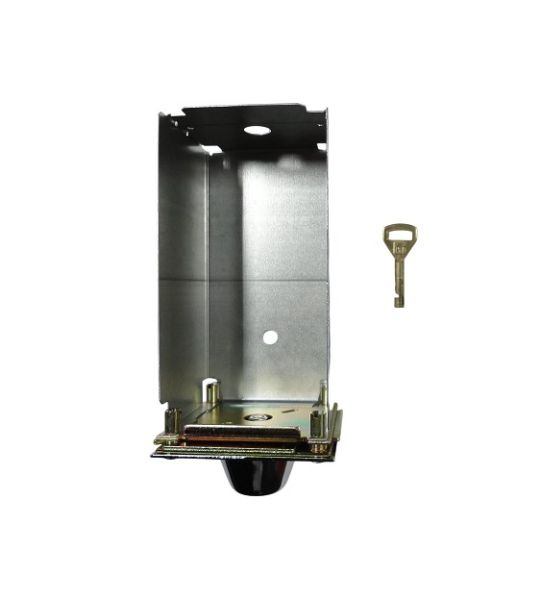
The Whirlpool W11190039 Coin Box securely collects payments for commercial washers and dryers, ensuring efficient coin-based operation. Once coins are inserted, the mechanism unlocks the machine, allowing the wash or dry cycle to begin. The secure metal construction protects against tampering, while the internal design ensures smooth coin processing. Durable and easy to install, it enhances operational control by preventing unauthorized use. Ideal for laundromats and multi-housing facilities, it helps streamline revenue collection and maintain reliable service.
Step 1: Prioritize Safety: Before engaging in any kind of replacement, it should ensure that all electrical power sources, along with water and gas lines, are turned off. Standing on wet surfaces should be avoided to mitigate the risk of electric shock.
Step 2: Assemble Tools and Components: To replace your Whirlpool W11190039 Box, several essential tools will be required. This includes a Philips head screwdriver, needle-nose pliers, and a wrench. Additionally, it should ensure that the appropriate replacement components, such as new mounting brackets and screws, are possessed prior to starting.
Step 3: Detach Old Box: The old box should be unscrewed from its mounting frame. The Philips head screwdriver should be utilized to take out the screws, being mindful to keep track of any washers or small components that may be needed for reattachment later. The box should be carefully pulled away from the frame to prevent damaging any wires.
Step 4: Position New Box: After the old Whirlpool W11190039 box is removed, the new one should be positioned. First, any necessary mounting hardware should be attached to the box. Next, the holes of the box should be aligned with those of the mounting frame, and the screws should be used to fasten it securely.
Step 5: Reconnect Lines: Once the box is secured, the gas or water supply lines should be reconnected. It should ensure that the correct components for this step are possessed, as improper connections can result in significant damage over time. The wrench should be utilized to firmly tighten the connections.
Step 6: Verify Connections: Before finalizing the replacement, it should be verified that all connections are secure and functioning correctly. This will enable any loose connections to be addressed before they escalate into issues.
Well done! The replacement of your Whirlpool W11190039 Box has been successfully completed. With just a few straightforward steps, your newly installed appliance can be quickly enjoyed.
Please remember, these instructions serve as general guidance and should always be referenced alongside the manufacturer's manual, if available.