Whirlpool W11175807 Refrigerator Axle

Special Price $9.80 Regular Price $11.21
In stock
Available Quantity:   19
SKU
W11175807

Product Description

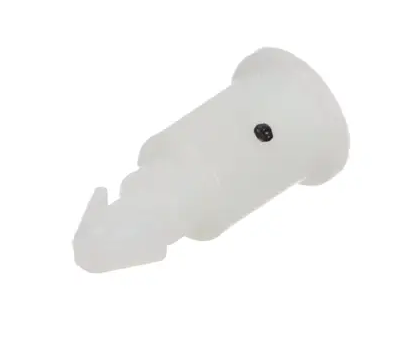
The Whirlpool W11175807 Refrigerator Axle is an essential component for the smooth movement of refrigerator shelves and drawers. This axle, which is frequently made of strong materials like plastic or metal, serves as the pivot point for the shelves and drawers. It is commonly used in several versions of Whirlpool refrigerators. The axle provides easy access to stored objects in the refrigerator, allowing users to organize and retrieve food products with ease. The W11175807 Refrigerator Axle improves the refrigerator's performance and convenience by ensuring that shelves and drawers move smoothly along their tracks. Its solid construction and precise engineering add to its endurance and dependability, offering consumers consistent performance over time. Whether accessing commonly used goods or reorganizing.

Lights & Lamps,
Manufacturer
✓ This Product Replaces: W10628712
https://www.hnkparts.com/media/catalog/product/w/1/w11175807_whirlpool_hnkparts.png

This Part Fits the Following Models (430)

KitchenAid Refrigerator KRSC503EBS00 KRSC503EBS00 KitchenAid Refrigerator KRSC500ESS01 KRSC500ESS01 KitchenAid Refrigerator KRSF705HBS01 KRSF705HBS01 KitchenAid Refrigerator KRSF705HPS01 KRSF705HPS01 KitchenAid Refrigerator KRSF505EWH00 KRSF505EWH00 KitchenAid Side-By-Side Refrigerator KRSF705HPS00 KRSF705HPS00 KitchenAid Side-By-Side Refrigerator KRSF705HBS00 KRSF705HBS00 KitchenAid Side-By-Side Refrigerator KRSF505EWH01 KRSF505EWH01 KitchenAid Side-By-Side Refrigerator KRSF505ESS01 KRSF505ESS01 KitchenAid Side-By-Side Refrigerator KRSF505EBL01 KRSF505EBL01 KitchenAid Side-By-Side Refrigerator KRSC703HPS00 KRSC703HPS00 KitchenAid Side-By-Side Refrigerator KRSC703HBS00 KRSC703HBS00 KitchenAid Side-By-Side Refrigerator KRSC700HBS00 KRSC700HBS00 KitchenAid Side-By-Side Refrigerator KRSC700HPS00 KRSC700HPS00 KitchenAid Refrigerator KRSC503ESS01 KRSC503ESS01
Showing 1-15 of 430
Manufacturer Name: WHIRLPOOL
Product Number: W11175807
OEM Part Number: W11175807
Product Description: Axle

Choose the best Home Appliance parts and supplies from HnKParts!

  • Same Day Shipping

  • Best Quality And Best Price

  • Wide Range of Inventory

  • Best Customer Service

Have More Questions or Need Help to Place The Order?
Reach us at (866)723-0907 or [email protected]

Write Your Own Review
You're reviewing:Whirlpool W11175807 Refrigerator Axle
Your Rating
Customer Questions
No Questions

Installation Steps

Step 1: Your Whirlpool W11175807 washing machine should be disconnected from the electrical outlet prior to initiating the replacement process.

Step 2: The electrical components should be inspected and the screws securing the top panel should be identified. A Phillips head screwdriver should be utilized to take out these screws located at the upper section of the washing machine.

Step 3: The top panel should be removed and placed aside. While it is feasible for the axle to be replaced without detaching the back cover, it is advisable for enhanced accessibility for it to be done. To accomplish this, the screws located near the bottom edge of the Whirlpool W11175807 should be unscrewed.

Step 4: The motor mounting bracket should be identified and its two screws should be taken out. These will be situated at the lower part of the washer close to the water level switch.

Step 5: The wiring harness should be detached from the motor mounting bracket. This involves the small plastic tab being pressed down and the wiring harness being extracted.

Step 6: At this point, the motor bracket along with its connected components can be detached. The complete assembly should be extracted from the washer.

Step 7: The axle nut located at the back of the motor should be unscrewed. Caution should be exercised to avoid misplacing the two washers that may exist between the axle and the motor.

Step 8: The axle should be extracted from the existing motor and substituted with the new one. It should ensure that the new axle fits smoothly into the motor and that the axle nut is secured tightly.

Step 9: The wiring harness should be reconnected to the motor bracket.

Step 10: The motor bracket along with its two screws should be reinstalled.

Step 11: The washer should be reconnected to the power source and activated to verify that the axle has been replaced correctly.

Step 12: The top panel should be repositioned, the screws should be fastened, and the task is complete.

Please note, these guidelines are served as general advice and should always be utilized alongside the manufacturer's manual, if accessible.