The store will not work correctly in the case when cookies are disabled.
We collect user information to provide a better user experience and protect the security of our website. By continuing to use our website, you acknowledge the use of cookies.
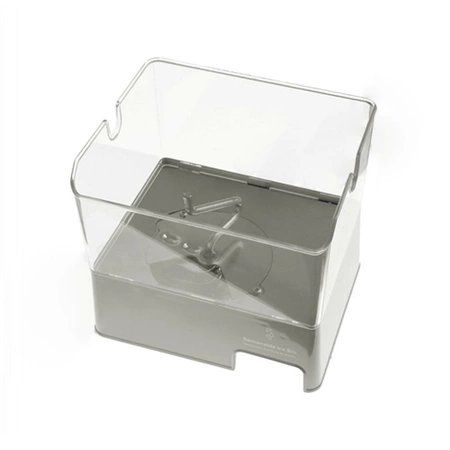
The Whirlpool W11129522 Ice Container Assembly efficiently stores and dispenses ice from the refrigerator door for easy access. Ice cubes are collected in the bucket and dispensed through the built-in mechanism. The auger system moves ice smoothly to the dispenser chute, ensuring consistent flow. This design minimizes ice clumping and provides quick dispensing. It enhances convenience by reducing the need to scoop ice manually while optimizing freezer space for better organization.
Step 1: Your refrigerator should be disconnected from the electrical outlet and any items should be taken out from the freezer.
Step 2: A Phillips screwdriver should be utilized to take out the two screws situated at the top of the ice container assembly.
Step 3: The ice container assembly should be extracted and set down upside down on a level surface.
Step 4: With a flat screwdriver or plastic pry tool, the four clips securing the ice maker’s wire harness should be gently detached.
Step 5: The Phillips screwdriver should be employed to take off the two screws found on the front panel of the ice maker.
Step 6: The old ice maker assembly should be carefully extracted from the refrigerator.
Step 7: Your new ice maker assembly should be positioned into the freezer. It should ensure that the two screws on the front panel of the ice maker are tightly secured.
Step 8: The four clips that secure the wire harness should be reattached.
Step 9: The two screws at the top of the ice container assembly should be placed back in.
Step 10: The refrigerator should be reconnected to the power source and the electricity should be switched on.
Step 11: Your new Whirlpool W11129522 ICE-CONTNR-ASSY should be relished!
Please remember that these instructions are served as general guidance and should always be followed in conjunction with the manufacturer's manual, if one is available.