The store will not work correctly in the case when cookies are disabled.
We collect user information to provide a better user experience and protect the security of our website. By continuing to use our website, you acknowledge the use of cookies.
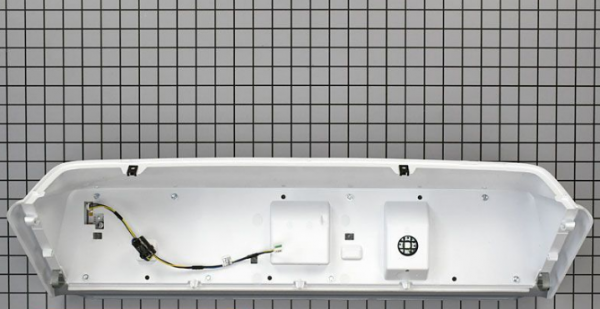
The Whirlpool W11112661 Dishwasher Control Panel Assembly is used to restore all the functions. The control panel in the assembly contains the buttons and screen needed to choose wash cycles, operate the machine, and make other settings. Users can restore their dishwasher’s performance and control by replacing the faulty or broken panel with a new one.
What maintenance is required for the Whirlpool W11112661 Control Panel Assembly?
To maintain the dishwasher Control Panel Assembly, regularly wipe the panel with a soft, damp cloth to remove grease and debris. Avoid chemicals to prevent damage. Ensure buttons and touch controls are dry after cleaning to prevent electrical issues.
What are common issues with the Whirlpool W11112661 Control Panel Assembly?
Buttons may become unresponsive or sticky.
Display screen may flicker or fail to light.
Error codes appearing incorrectly.
Panel may not register touch inputs consistently.
Installation Steps
Step1: Turn off the dishwasher power at the circuit breaker to avoid electrical shock.
Step2: Open the dishwasher door and remove screws securing the inner door panel.
Step3: Carefully separate the old control panel and disconnect wiring harnesses.
Step4: Attach wires to the new control panel assembly securely.
Step5: Align and reinstall the panel, tightening screws firmly.
Step6: Restore power and test functionality to ensure proper installation.