
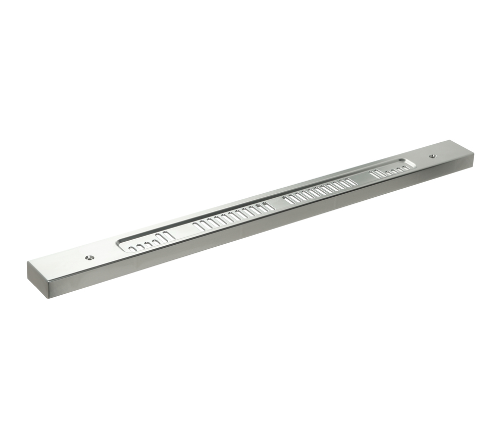
Whirlpool W11096161 Range Trim Vent

Special Price $75.55 Regular Price $90.95
In stock
Available Quantity:   54
SKU
W11096161

Product Description

The Whirlpool W11096161 is a vent trim that fits Whirlpool and Maytag range hoods. This is a non-functional component that surrounds the outer vent aperture of your range hood, which is normally positioned above the cooktop. The trim provides two primary functions: beauty and functionality. This primarily improves the visual attractiveness of your range hood by offering a clean and completed appearance that compliments the surrounding cabinetry and appliances. In addition, the vent trim can assist hide minor flaws or gaps between the range hood and the wall. While not directly engaged in fume venting, properly fitted trim can help to channel airflow more effectively by providing a smoother transition between the range hood vent and the surrounding area.

Manufacturer
https://www.hnkparts.com/media/catalog/product/w/1/w11096161_whirlpool_hnkparts.png
Manufacturer Name: WHIRLPOOL
Product Number: W11096161
OEM Part Number: W11096161
Product Description: Trim-Vent

Choose the best Home Appliance parts and supplies from HnKParts!

  • Same Day Shipping

  • Best Quality And Best Price

  • Wide Range of Inventory

  • Best Customer Service

Have More Questions or Need Help to Place The Order?
Reach us at (866)723-0907 or [email protected]

Write Your Own Review
You're reviewing:Whirlpool W11096161 Range Trim Vent
Your Rating
Customer Questions
What maintenance is required for the Whirlpool W11096161 Trim Vent?

Regularly wipe the range trim vent with a soft, damp cloth to remove grease, dust, and cooking residue. Avoid abrasive cleaners that may scratch the surface. Check for proper alignment and secure fit during cleaning. Ensure the vent area remains unobstructed for safe airflow.

What are common issues with the Whirlpool W11096161 Trim Vent?

  • Grease and residue buildup restricting airflow.
  • Loose or misaligned trim affecting fit and appearance.
  • Surface scratches or discoloration from harsh cleaners.
  • Warping due to prolonged heat exposure.

Installation Steps

Step1: Turn off power to the range at the breaker to avoid electrical hazards.

Step2: Allow the appliance to cool completely before starting installation.

Step3: Remove the existing trim vent by unscrewing mounting screws.

Step4: Align the new trim vent in position over the vent opening.

Step5: Secure it firmly using the provided screws.

Step6: Restore power and test for proper fit and ventilation.