
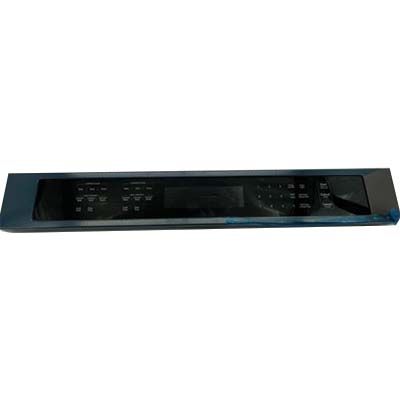
Whirlpool W11086152 Oven Control Panel

Special Price $394.90 Regular Price $502.09
In stock
Available Quantity:   16
SKU
W11086152

Product Description

The Whirlpool W11086152 Oven Control Panel works as the main control interface to operate and check the oven functions which comprise temperature settings together with cooking modes and timers. This part operates with different electric ovens to deliver accurate control and dependable performance. Its sturdy build and natural appliance integration enable the appliance to function reliably while extending its durability.
Manufacturer

https://www.hnkparts.com/media/catalog/product/w/1/w11086152_whirlpool_hnkparts.png
Manufacturer Name: WHIRLPOOL
Product Number: W11086152
OEM Part Number: W11086152
Product Description: Panl-Cntrl+Core

Choose the best Home Appliance parts and supplies from HnKParts!

  • Same Day Shipping

  • Best Quality And Best Price

  • Wide Range of Inventory

  • Best Customer Service

Have More Questions or Need Help to Place The Order?
Reach us at (866)723-0907 or [email protected]

Write Your Own Review
You're reviewing:Whirlpool W11086152 Oven Control Panel
Your Rating
Customer Questions
What maintenance is required for the Whirlpool W11086152 Control Panel?

Wipe the oven control panel regularly with a soft, damp cloth to remove grease and spills. Avoid harsh chemicals or abrasive materials. Check buttons for sticking or unresponsiveness. Proper maintenance ensures accurate temperature settings and better operation.

What are common issues with the Whirlpool W11086152 Control Panel?

  • Oven buttons not responding or sticking.
  • Display flickering or unreadable.
  • Oven not heating correctly.
  • Error codes appearing during operation.

Installation Steps

Step1: Turn off power at breaker and ensure oven is cool.

Step2: Remove mounting screws securing the old control panel.

Step3: Carefully disconnect wiring harnesses and note connections.

Step4: Align new control panel and reconnect all electrical connectors firmly.

Step5: Secure panel with screws and ensure proper fit.

Step6: Restore power and test display and controls for correct operation.