
Special Price
$196.97
Regular Price
$218.95
In stock
Available Quantity:
150
SKU
W11026866
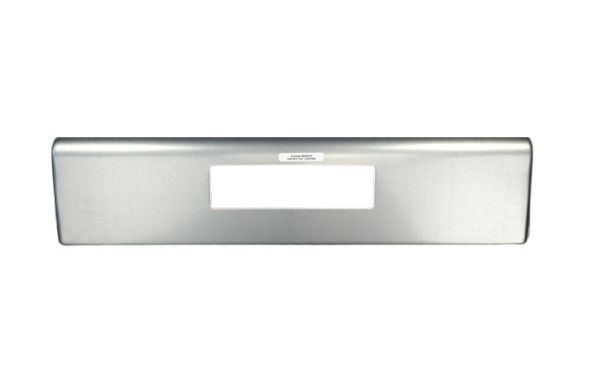
The Whirlpool W11026866 Range Control Panel ensures accurate control of the oven functions is compatible with some models and comes with a simple-to-use control panel that enables setting temperatures, cooking options, and time. This panel can send the commands input by the user to the oven system to make it work as required and expected. Its construction controls are sensitive which helps in making the process of cooking.
Manufacturer

This Part Fits the Following Models (35)
Whirlpool Gas Range WFG525S0JZ1 WFG525S0JZ1
Whirlpool Gas Range WFG525S0JS1 WFG525S0JS1
Whirlpool Gas Range WFG535S0JZ1 WFG535S0JZ1
Whirlpool Free Standing Gas Range WFG510S0HS1 WFG510S0HS1
Whirlpool WFG525S0JS5 Range/Oven
Whirlpool Gas Freestanding Range WFG510S0HS0 WFG510S0HS0
Whirlpool WFG525S0JV5 Gas Range/Oven
Whirlpool WFG525S0JZ5 Gas Range/Oven
Whirlpool WFG535S0LS4 Gas Range/Oven
Whirlpool Free Standing Gas Range WFG525S0JZ0 WFG525S0JZ0
Whirlpool Free Standing Gas Range WFG535S0JV0 WFG535S0JV0
Whirlpool Free Standing Gas Range WFG535S0JS0 WFG535S0JS0
Whirlpool Free Standing Gas Range WFG535S0JZ0 WFG535S0JZ0
Whirlpool Free Standing Gas Range WFG525S0JV0 WFG525S0JV0
Whirlpool Free Standing Gas Range WFG525S0JS0 WFG525S0JS0
Showing 1-15
of 35
| Manufacturer Name: WHIRLPOOL Product Number: W11026866 OEM Part Number: W11026866 Product Description: Panl-Cntrl |
Choose the best Home Appliance parts and supplies from HnKParts!
Same Day Shipping
Best Quality And Best Price
Wide Range of Inventory
Best Customer Service
Have More Questions or Need Help to Place The Order?
Reach us at (866)723-0907 or [email protected]
Write Your Own Review
Customer Questions
Installation Steps
Step1: Disconnect power range at the breaker to avoid electric shock.
Step2: Remove mounting screws securing the old control panel.
Step3: Carefully detach wiring connectors from the existing panel.
Step4: Connect wires to the new control panel, matching positions.
Step5: Align and secure the new panel with screws.
Step6: Restore power and test functionality to ensure proper installation.
