
$14.42
In stock
Available Quantity:
388
SKU
W11025649
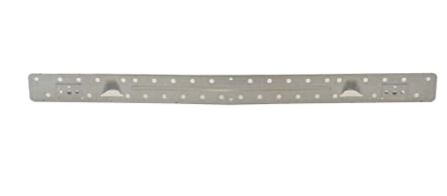
The Whirlpool W11025649 Microwave Mounting Bracket is designed to give firm support to the over-the-range microwave for safety and simple use and it is the wall-mounting type that ensures that the appliance is supported to avoid sagging and instability. This metal bracket is high quality enough to fix the wall studs and provides a lock to fix the microwave securely. It makes installation easier and does not require additional changes while fitting the kitchen.
Manufacturer

✓ This Product Replaces:
W10245177, W10440498
This Part Fits the Following Models (749)
Whirlpool WMH76718AS1 Microwave/Hood Combo
Whirlpool WMH76718AW0 Microwave/Range Hood Combo
Whirlpool WMH76718AW1 Microwave/Hood Combo
Whirlpool WMH76719CE2 Microwave/Hood Combo
Whirlpool WMH75021HZ1 Microwave/Hood Combo
Whirlpool WMH75021HZ0 Microwave/Hood Combo
Whirlpool WMH75021HV1 Microwave/Hood Combo
Whirlpool WMH75021HV0 Microwave/Hood Combo
Whirlpool WMH75520AW0 Microwave/Range Hood Combo
Whirlpool WMH76718AB0 Microwave/Range Hood Combo
Whirlpool WMH76718AB1 Microwave/Hood Combo
Whirlpool WMH76718AS0 Microwave/Range Hood Combo
Whirlpool WMH75520AS0 Microwave/Range Hood Combo
Whirlpool WMH75520AB0 Microwave/Range Hood Combo
Whirlpool YWMH78019HZ04 Microwave/Hood Combo
Showing 1-15
of 749
| Manufacturer Name: WHIRLPOOL Product Number: W11025649 OEM Part Number: W11025649 Product Description: Plate-Mtng |
Choose the best Home Appliance parts and supplies from HnKParts!
Same Day Shipping
Best Quality And Best Price
Wide Range of Inventory
Best Customer Service
Have More Questions or Need Help to Place The Order?
Reach us at (866)723-0907 or [email protected]
Write Your Own Review
Customer Questions
Installation Steps
Step1: Disconnect power to the microwave at the breaker.
Step2: Mark wall studs and align mounting plate using a level.
Step3: Drill pilot holes and insert proper anchors if needed.
Step4: Secure mounting plate firmly with screws into studs or anchors.
Step5: Lift microwave onto plate and lock into position.
Step6: Restore power and ensure the unit is stable and properly supported.
