
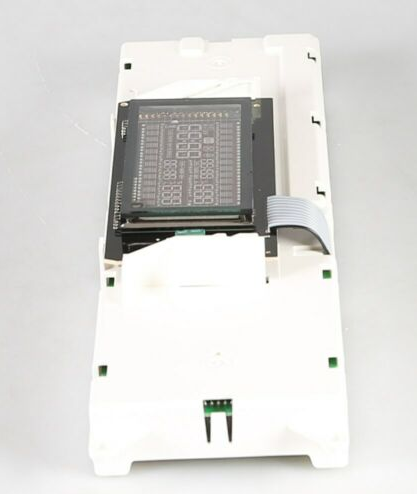
Whirlpool W10878844 Range Oven Control Board

Special Price $195.86 Regular Price $335.59
In stock
Available Quantity:   35
SKU
W10878844

Product Description

The Whirlpool W10878844 Range Oven Control Board helps in maintaining the temperature control and proper functioning of the oven. This control board controls operations of the oven which include baking, broiling and others through signals to heating elements and relays. It operates through the intake of information from temperature sensors and commands from the user to set the right cooking temperature.
Manufacturer

https://www.hnkparts.com/media/catalog/product/w/1/w10878844_whirlpool_hnkparts.png
Manufacturer Name: WHIRLPOOL
Product Number: W10878844
OEM Part Number: W10878844
Product Description: Cntrl-Elec

Choose the best Home Appliance parts and supplies from HnKParts!

  • Same Day Shipping

  • Best Quality And Best Price

  • Wide Range of Inventory

  • Best Customer Service

Have More Questions or Need Help to Place The Order?
Reach us at (866)723-0907 or [email protected]

Write Your Own Review
You're reviewing:Whirlpool W10878844 Range Oven Control Board
Your Rating
Customer Questions
What maintenance is required for the Whirlpool W10878844 Control Board?

Verify stored settings remain saved after powering the unit on and off. Check that the board responds when switching between different functions. Ensure connectors remain firmly attached. Run a short cooking cycle to confirm commands process in the correct order.

What are common issues with the Whirlpool W10878844 Control Board?

  • Cooking cycle not initiating.
  • Temperature failing to adjust.
  • Timer not counting down.
  • Functions skipping programmed steps.

Installation Steps

Step1: Switch off power to the range at the circuit breaker.

Step2: Remove the back control panel to remove the electronic board.

Step3: Note wire locations, then disconnect harness plugs from the old board.

Step4: Unscrew mounting hardware and lift the old board out.

Step5: Set the new board in place and fasten screws securely.

Step6: Reconnect wiring, reinstall the panel, restore power, and verify display operation.