Special Price
$42.78
Regular Price
$43.92
In stock
Available Quantity:
92
SKU
W10872674
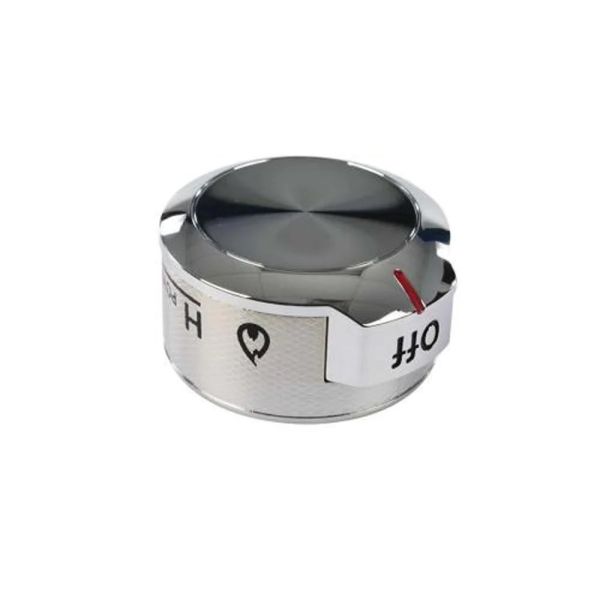
The Whirlpool W10872674 Range Stove Surface Burner Knob provides precise control over heat settings for efficient cooking. It attaches securely to the burner valve, allowing smooth rotation to adjust flame intensity. Designed for compatibility, it ensures a seamless fit and performance with supported models. The durable construction resists damage, maintaining functionality over time. Its design enhances usability, offering a comfortable grip for easy operation. A simple-to-use component that allows the process of quick replacement, restoring the appliance’s performance without hassle.
Manufacturer
✓ This Product Replaces:
W10579761
This Part Fits the Following Models (29)
KitchenAid Dual Fuel Range YKSDB900ESS4 YKSDB900ESS4
KitchenAid Gas Range KSGG700EBL0 KSGG700EBL0
KitchenAid Gas Range KSGG700EBL1 KSGG700EBL1
KitchenAid Gas Range KSGG700EBS1 KSGG700EBS1
KitchenAid Gas Range KSGG700ESS0 KSGG700ESS0
KitchenAid Gas Range KSGG700EBS2 KSGG700EBS2
KitchenAid Gas Range KSGB900ESS4 KSGB900ESS4
KitchenAid Gas Range KSGB900EWH0 KSGB900EWH0
KitchenAid Gas Range KSGB900ESS2 KSGB900ESS2
KitchenAid Gas Range KSGB900ESS3 KSGB900ESS3
KitchenAid Gas Range KSGB900EBL0 KSGB900EBL0
KitchenAid Gas Range KSGB900ESS0 KSGB900ESS0
KitchenAid Dual-Fuel Slide-In Range KSDB900ESS1 KSDB900ESS1
KitchenAid Dual Fuel Range KSDB900ESS4 KSDB900ESS4
KitchenAid Gas Range KSGG700EWH0 KSGG700EWH0
Showing 1-15
of 29
| Manufacturer Name: WHIRLPOOL Product Number: W10872674 OEM Part Number: W10872674 Product Description: Knob |
Choose the best Home Appliance parts and supplies from HnKParts!
Same Day Shipping
Best Quality And Best Price
Wide Range of Inventory
Best Customer Service
Have More Questions or Need Help to Place The Order?
Reach us at (866)723-0907 or [email protected]
Write Your Own Review
Customer Questions
Installation Steps
Step 1: The appliance should be disconnected from the wall outlet to guarantee safety.
Step 2: The flat-head screwdriver should be employed to loosen the screws fastening the old knob. After loosening, the knob should be carefully detached.
Step 3: The new knob should be positioned so that the slots align with the shaft at the front of the control panel.
Step 4: The knob should be fastened by tightening the screws with the pliers. A secure grip should be ensured while avoiding over-tightening the screws.
Step 5: The appliance should be reconnected to the wall outlet and the knob should be checked to confirm it is operating properly.
It is important to note that these instructions are served as general guidance and should always be utilized alongside the manufacturer's manual, if available.
