
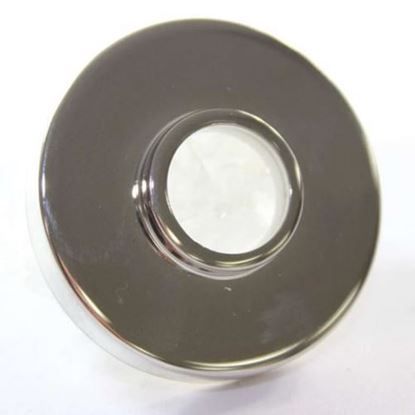
Whirlpool W10853046 Cooktop Bezel Knob

Special Price $29.37 Regular Price $50.88
In stock
Available Quantity:   302
SKU
W10853046
✓ This Product Replaces: W10593536

Product Description

The Whirlpool W10853046 Range Bezel Knob is used to adjust the settings of the stove and it works by connecting to the range safely and enabling users to set temperature levels with ease. This bezel knob contributes to the proper functioning of the range and makes the appliance safer and easier to use as it provides the user with direct control of the cooking temperature. Due to its easy installation, it can be used to improve the performance of appliances and is therefore useful.
Knobs,
Manufacturer
https://www.hnkparts.com/media/catalog/product/w/1/w10853046_whirlpool_hnkparts.jpg
Manufacturer Name: WHIRLPOOL
Product Number: W10853046
OEM Part Number: W10853046
Product Description: Bezel-Knob

Choose the best Home Appliance parts and supplies from HnKParts!

  • Same Day Shipping

  • Best Quality And Best Price

  • Wide Range of Inventory

  • Best Customer Service

Have More Questions or Need Help to Place The Order?
Reach us at (866)723-0907 or [email protected]

Write Your Own Review
You're reviewing:Whirlpool W10853046 Cooktop Bezel Knob
Your Rating
Customer Questions
What maintenance is required for the Whirlpool W10853046 Bezel Knob?

Regularly wipe the cooktop bezel knob with a damp cloth to remove grease and food debris. Avoid harsh chemicals that may damage the finish. Inspect for looseness and ensure the knob turns smoothly to maintain safe operation. Cleaning prevents buildup that can interfere with proper operation.

What are common issues with the Whirlpool W10853046 Bezel Knob?

  • Knob becoming loose or wobbly during use.
  • Difficulty turning due to grease or residue buildup.
  • Cracking or chipping from heat exposure.
  • Misalignment causing inaccurate burner control.

Installation Steps

Step1: Turn off cooktop and allow surface to cool completely.

Step2: Remove damaged knob by pulling straight off the shaft gently.

Step3: Align new knob with control shaft and position correctly.

Step4: Push knob firmly until it seats securely on the spindle.

Step5: Restore power and test rotation for smooth operation.

Step6: Ensure gas or electric controls respond properly before use.

Step7: Wear insulated gloves and confirm power disconnection before handling components.
