Special Price
$74.22
Regular Price
$87.01
In stock
Available Quantity:
113
SKU
W10850377
The 
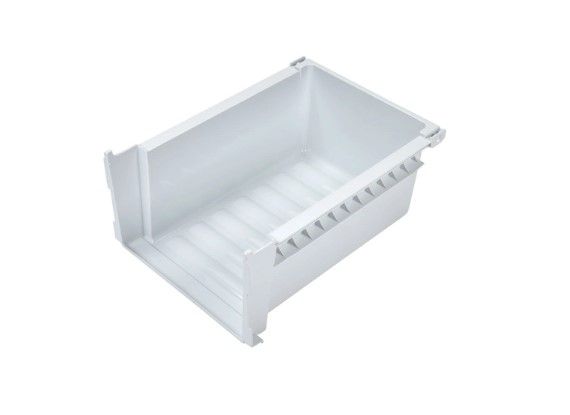
Whirlpool W10850377 Refrigerator Crisper Pan is used to store fruits and vegetables to keep them fresh. It operates on the concept of a controlled atmosphere that has a variable humidity level which helps to keep the produce fresh for longer. It is easy to slide in and out of the fridge, which makes it convenient to access the food stored in it. This crisper pan helps to minimize wastage of food by preserving the freshness of the produce to be used in preparing meals.
Manufacturer
✓ This Product Replaces:
W10387757, W10422706, W10626157, WPW10422706
This Part Fits the Following Models (73)
Whirlpool WRF736SDAB13 Refrigerator
Whirlpool WRF736SDAB00 Refrigerator
Whirlpool WRF736SDAT00 Refrigerator
Whirlpool WRF736SDAM13 Refrigerator
Whirlpool WRF736SDAF00 Refrigerator
Whirlpool WRF736SDAF12 Refrigerator
Whirlpool WRF736SDAM00 Refrigerator
Whirlpool WRF736SDAT10 Refrigerator
Whirlpool WRF767SDHV04 Bottom-Mount Refrigerator
Whirlpool WRF757SDEM00 Refrigerator
Whirlpool WRF757SDHZ04 Bottom-Mount Refrigerator
Whirlpool WRF767SDHV03 Bottom-Mount Refrigerator
Whirlpool WRF757SDEE00 Refrigerator
Whirlpool WRF757SDEH00 Refrigerator
Whirlpool WRF736SDAW13 Refrigerator
Showing 1-15
of 73
| Manufacturer Name: WHIRLPOOL Product Number: W10850377 OEM Part Number: W10850377 Product Description: Pan-Crispr |
Choose the best Home Appliance parts and supplies from HnKParts!
Same Day Shipping
Best Quality And Best Price
Wide Range of Inventory
Best Customer Service
Have More Questions or Need Help to Place The Order?
Reach us at (866)723-0907 or [email protected]
Write Your Own Review
Customer Questions
Installation Steps
Step1: Unplug the refrigerator to ensure safety before installation.
Step2: Open the refrigerator door and remove any existing crisper drawer.
Step3: Align the new crisper pan with the designated shelf tracks.
Step4: Carefully slide the pan into position until it sits securely.
Step5: Ensure smooth movement by pulling the drawer in and out gently.
Step6: Avoid overloading to prevent damage and ensure proper airflow.
