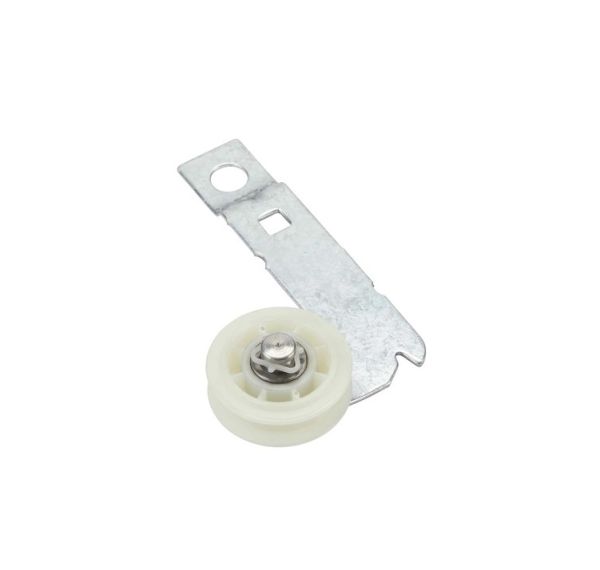
This Part Fits the Following Models (1079)
Whirlpool Dryer Idler Pulley with Bracket W10837240
The Whirlpool Dryer Idler Pulley with Bracket W10837240 is a necessary component for your dryer's maximum performance. This idler pulley, made with meticulous craftsmanship and robust materials, ensures that the dryer drum rotates smoothly by tensioning the drive belt. This strong bracket provides stability and support, minimizing vibration and noise throughout the operation. This idler pulley with bracket is specifically designed for use with Whirlpool dryers, ensuring a flawless fit and quick installation. Whether you're replacing a worn part or doing normal maintenance, this genuine Whirlpool accessory provides dependability and longevity, extending the life of your dryer. The Whirlpool Dryer Idler Pulley with Bracket W10837240 is designed to endure the rigors of daily operation.
Key Features of Whirlpool Dryer Idler Pulley with Bracket W10837240
-
Durable Construction: Made from sturdy materials for long-lasting durability.
-
Easy Installation: Designed for quick and hassle-free installation on compatible Whirlpool washer models.
-
Secure Closure: Ensures the washer lid locks securely during operation to prevent accidents.
-
Compatibility: Compatible with select Whirlpool washer models, ensuring proper fit and function.
-
Reliable Performance: Helps maintain smooth operation of the washer by ensuring proper lid closure.
Installation Steps
Step 2: Take Off Front Panel. Your Phillips screwdriver should be employed to take out the screws encircling the front panel of the washer. After all screws are extracted, the front panel should be gently tilted outward to detach it from any clips that might be holding it in place.
Step 3: Reach Idler Pulley. At this stage, access to the idler pulley should be available. The flat-head screwdriver should be utilized to take out the screw that secures the idler pulley bracket to the washer's side.
Step 4: Detach Idler Pulley. With the screw eliminated, access to the idler pulley can now be obtained. Your needle nose pliers should be used to detach the spring connecting the bracket and the idler pulley. After the spring is removed, the 7/16” socket can be used to take out the mounting bolt that holds the idler pulley to the bracket.
Step 5: Fit New Idler Pulley. After the old idler pulley has been taken out, the new one can be proceeded to be installed. The new idler pulley should be fastened to the bracket using the 7/16” socket. The pulley should be secured with the mounting bolt. Then, the spring should be attached to both the bracket and the idler pulley to complete the installation.
Step 6: Reattach Front Panel. With the new idler pulley in place, the front panel of the washer can now be returned to its original position. Your Phillips screwdriver should be used to secure the front panel by reinstalling all of the screws.
Step 7: Verify New Idler Pulley. Finally, the washer should be reconnected to the power source and it should be verified that the new idler pulley is functioning correctly.
By adhering to this DIY guide, a fully operational idler pulley on your Whirlpool W10837240 washer should now be possessed. Should any issues be encountered during this task, a qualified professional should be consulted for assistance.
Please remember that these instructions serve as general guidance and should always be used alongside the manufacturer's manual, if one is available.
