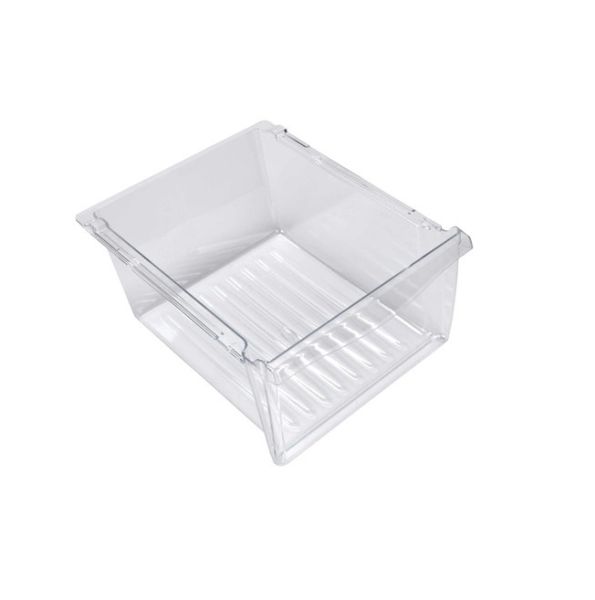
Special Price
$82.83
Regular Price
$101.24
In stock
Available Quantity:
93
SKU
W10833528
The Whirlpool W10833528 Crisper Pan Drawer is useful in maintaining the freshness of foods by offering a separate compartment for fruits and vegetables in a refrigerator. Intended to be easily slid into position, it controls the amount of moisture in the air to keep produce fresh for longer. It is made of clear plastic that is durable and enables to easily see the contents of the storage and being able to access them easily. It also has a compact design that does not allow for the escape of moisture hence the food remains crispy and less spoilage.
Manufacturer
This Part Fits the Following Models (423)
Maytag MBF1958XEQ2 Bottom-Mount Refrigerator
Maytag MBF1958XEB6 Bottom-Mount Refrigerator
Maytag MBF1958XEB4 Bottom-Mount Refrigerator
Maytag MBF1958XEB5 Bottom-Mount Refrigerator
Maytag MBF1958XEB3 Bottom-Mount Refrigerator
Maytag MBF1958XEB2 Bottom-Mount Refrigerator
Maytag MBF1958XEW6 Bottom-Mount Refrigerator
Maytag MBF1958XEW2 Bottom-Mount Refrigerator
Maytag MBF1958XEW3 Bottom-Mount Refrigerator
Maytag MBF1958XES6 Bottom-Mount Refrigerator
Maytag MBF1952VEW1 Bottom-Mount Refrigerator
Maytag MBF1953YEW4 Bottom-Mount Refrigerator
Maytag MBF1956HEB Bottom-Mount Refrigerator
Maytag MBF1953YEW3 Bottom-Mount Refrigerator
Maytag MBF1953YEW2 Bottom-Mount Refrigerator
Showing 1-15
of 423
| Manufacturer Name: WHIRLPOOL Product Number: W10833528 OEM Part Number: W10833528 Product Description: Pan-Crispr |
Choose the best Home Appliance parts and supplies from HnKParts!
Same Day Shipping
Best Quality And Best Price
Wide Range of Inventory
Best Customer Service
Have More Questions or Need Help to Place The Order?
Reach us at (866)723-0907 or [email protected]
Write Your Own Review
Customer Questions
Installation Steps
Step1: Unplug the refrigerator and empty the crisper section.
Step2: Remove the existing drawer carefully.
Step3: Align the new drawer with the side rails inside the compartment.
Step4: Slide the drawer in until it locks or sits firmly in place.
Step5: Check smooth movement, ensure proper seating, and wear gloves for safety.
Step6: If resistance occurs realign rails before forcing. Do not force installation.
