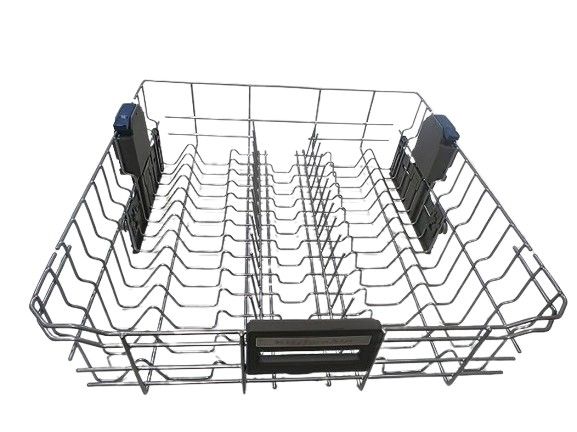
Special Price
$171.35
Regular Price
$189.95
In stock
Available Quantity:
25
SKU
W10728863
The Whirlpool W10728863 Upper Dishrack Assembly allows various kitchenware in placed securely and efficiently, this is designed to glide smoothly on tracks providing ease of loading and unloading, and keeping it looking steady on wash cycles. The construction of the bucket and its spaced condition enables efficient cleaning, with adjustable tines and ample spacing for dish variety. It restores functionality to compatible appliances and prolongs their usability, increasing the overall efficiency of the dishwashing process, and making dishwashing more convenient and more efficient with every use.
Manufacturer
✓ This Product Replaces:
8561731, W10078137, W10056270, W10312791
This Part Fits the Following Models (718)
KitchenAid KUDS03FSWH1 Dishwasher
KitchenAid KUDS03FSWH2 Dishwasher
KitchenAid KUDS03FSWH4 Dishwasher
KitchenAid KUDS03FSWH3 Dishwasher
KitchenAid KUDS03FSSS3 Dishwasher
KitchenAid KUDS03FSSS4 Dishwasher
KitchenAid KUDS02SRWH4 Dishwasher
KitchenAid KUDS02SRSS4 Dishwasher
KitchenAid KUDS02SRWH1 Dishwasher
KitchenAid KUDS02SRWH2 Dishwasher
KitchenAid KUDS02SRWH3 Dishwasher
KitchenAid KUDS02SRSS0 Dishwasher
KitchenAid KUDS02SRBL4 Dishwasher
KitchenAid KUDS02SRSS1 Dishwasher
KitchenAid KUDS02SRSS2 Dishwasher
Showing 1-15
of 718
| Manufacturer Name: WHIRLPOOL Product Number: W10728863 OEM Part Number: W10728863 Product Description: Dishrack (Dw1) |
Choose the best Home Appliance parts and supplies from HnKParts!
Same Day Shipping
Best Quality And Best Price
Wide Range of Inventory
Best Customer Service
Have More Questions or Need Help to Place The Order?
Reach us at (866)723-0907 or [email protected]
Write Your Own Review
Customer Questions
Installation Steps
Step1: Turn off power to the dishwasher before servicing.
Step2: Pull out the existing upper dishrack and remove the rail stop clips.
Step3: Slide the old dishrack completely out of the track rails.
Step4: Align the new upper dishrack assembly with the rails and slide it into place.
Step5: Reinstall the rail stop clips to secure the rack properly.
Step6: Test the rack movement to ensure smooth sliding and proper alignment.
