The store will not work correctly in the case when cookies are disabled.
We collect user information to provide a better user experience and protect the security of our website. By continuing to use our website, you acknowledge the use of cookies.
The 
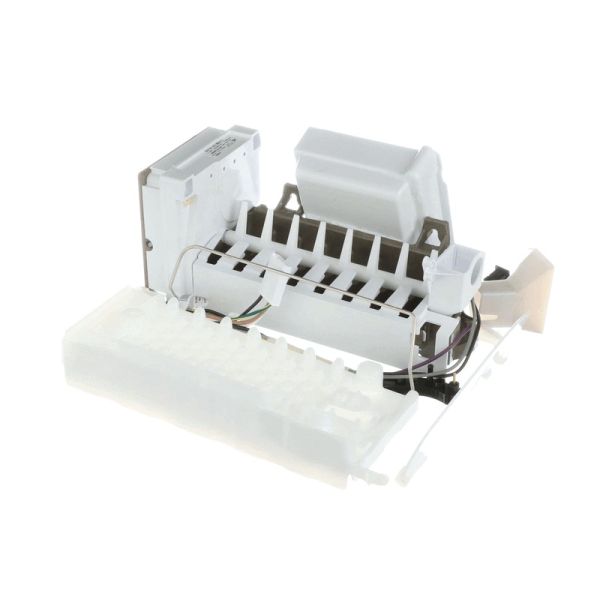
Whirlpool W10583817 Refrigerator Ice Maker Assembly is designed to make an efficient production of ice. It works by creating ice cubes automatically when water is supplied to the system and freezing to be dispensed in the storage bin. With this assembly, ice making is simplified, manual ice trays are no longer required and there is a consistent supply of ice for everyday needs. This component helps refrigerators function smoothly and conveniently, allowing cold beverages and keeping food at a steady ice supply.
What maintenance is required for the Whirlpool W10583817 Ice Maker Assembly?
Regularly inspect the refrigerator ice maker for ice buildup or blockages and clean the water inlet and tray with a mild detergent. Ensuring proper water flow prevents jams and contamination. Always disconnect power before cleaning for safety.
What are common issues with the Whirlpool W10583817 Ice Maker Assembly?
Ice maker not producing ice.
Ice cubes stuck or malformed.
Leaking water or overflow.
Unusual noises during operation.
Installation Steps
Step 1: Prior to commencing any DIY repair, it should ensure that the appliance is unplugged to prevent any risk of electric shocks or other dangers. Safety glasses and gloves should be donned for additional protection.
Step 2: The ice tray should be extracted by carefully pulling it out from the front of the freezer. All ice from the tray should be fully emptied.
Step 3: Subsequently, the ice maker must be detached from the freezer. Two screws situated at the top of the ice maker should be taken out using a Phillips head screwdriver. Once the screws are taken out, the ice maker should easily slide out of the freezer.
Step 4: With the old ice maker removed, the new one can now be proceeded to be installed. The new ice maker should be started by sliding into position within the freezer. It should ensure that the ice maker is aligned correctly and secured using the two screws.
Step 5: Prior to connecting the power cord, it should be confirmed that the connection is firm and secure. Once confidence is achieved that everything is connected properly, the power cord should be connected to the back of the freezer and the power switch should be activated.
Step 6: At this stage, the ice maker can be tested to verify that it is functioning correctly. The ice tray should be filled with water and the ice maker should be allowed to cycle. If everything is operating as it should, a consistent flow of ice should be seen.
Following these simple steps, your Whirlpool W10583817 Icemaker has been successfully substituted. The area around your ice maker should be maintained clean and devoid of debris to ensure optimal performance and safety.
Please remember, these instructions serve as general guidance and should always be utilized alongside the manufacturer's manual, if accessible.