
Special Price
$103.95
Regular Price
$124.71
In stock
Available Quantity:
56
SKU
W10443315
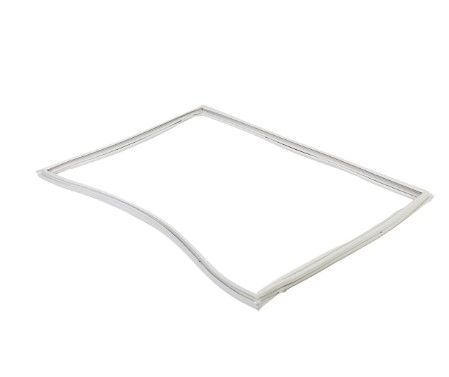
The Whirlpool W10443315 Refrigerator Door Gasket creates an airtight seal to maintain optimal cooling efficiency. It compresses against the door frame, preventing cold air from escaping. The flexible material ensures a snug fit, reducing energy loss and keeping food fresh longer. Its durable construction resists wear, extending the appliance’s lifespan. Easy to install and replace, it enhances cooling performance while lowering energy costs. By maintaining a consistent temperature, it helps preserve food quality and reduces unnecessary strain on the refrigerator.
Manufacturer

✓ This Product Replaces:
12683804W, 67003554, 8171163, W10130894, W10164036, W10571962
This Part Fits the Following Models (419)
Maytag MBF2258FEE00 Refrigerator
Maytag 5GBB22PRYW0 Refrigerator
Whirlpool WRF532SNHV00 Refrigerator
Whirlpool WRF532SNBW01 Refrigerator
Whirlpool WRF532SNBM00 Refrigerator
Whirlpool WRF532SNBM01 Refrigerator
Whirlpool WRF532SNBW00 Refrigerator
Whirlpool WRF532SNBB00 Refrigerator
Whirlpool WRF532SNBB01 Refrigerator
Whirlpool WRF532SMHZ00 Refrigerator
Whirlpool WRF532SMHW04 Bottom-Mount Refrigerator
Whirlpool WRF532SMHW03 Bottom-Mount Refrigerator
Whirlpool WRF532SMHW00 Refrigerator
Whirlpool WRF532SMHV00 Refrigerator
Whirlpool WRF532SMHB03 Refrigerator
Showing 1-15
of 419
| Manufacturer Name: WHIRLPOOL Product Number: W10443315 OEM Part Number: W10443315 Product Description: Gasket |
Choose the best Home Appliance parts and supplies from HnKParts!
Same Day Shipping
Best Quality And Best Price
Wide Range of Inventory
Best Customer Service
Have More Questions or Need Help to Place The Order?
Reach us at (866)723-0907 or [email protected]
Write Your Own Review
Customer Questions
Installation Steps
Step1: Unplug refrigerator safely and remove food items from door area.
Step2: Remove old gasket by loosening screws or pulling from channel using screwdriver if required.
Step3: Align new door gasket starting at corners, press into groove evenly along frame.
Step4: Warm gasket with hairdryer to improve seal if needed and ensure proper fit and sealing.
Step5: Tighten screws, close door, and check for airtight seal to confirm proper installation.
