
Special Price
$123.08
Regular Price
$221.85
In stock
Available Quantity:
35
SKU
W10443313
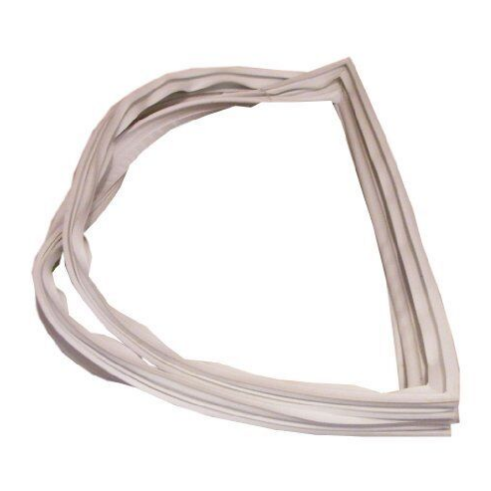
The Whirlpool W10443313 Refrigerator Door Gasket helps the appliance keep cold efficiently and securely. The flexible rubber gasket functions as a durable airtight seal between the door and refrigerator cabinet which stops warm air from entering and cold air from escaping. The refrigerator maintains stable interior temperatures through its gasket which decreases energy usage and keeps food fresh longer while stopping frost accumulation. The appliance operates more efficiently because of its precise fit and performance which protects the compressor from excessive strain while maintaining proper cooling.
Manufacturer

✓ This Product Replaces:
67003552, W10130893, W10164034, W10571964
This Part Fits the Following Models (359)
Amana AB2225PEKW5 Bottom-Mount Refrigerator
Amana ABB2223DEB1 Refrigerator
Amana ABB2222FEW2 Bottom-Mount Refrigerator
Amana ABB2222FEW3 Bottom-Mount Refrigerator
Amana AB2225PEKB4 Bottom-Mount Refrigerator
Amana AB2225PEKB3 Bottom-Mount Refrigerator
Amana AB2225PEKB5 Bottom-Mount Refrigerator
Amana ABB2222FEQ2 Bottom-Mount Refrigerator
Amana ABB2222FEQ3 Bottom-Mount Refrigerator
Amana ABB2222FES0 Refrigerator
Amana ABB2222FEW0 Bottom-Mount Refrigerator
Amana ABB2224WEW1 Bottom-Mount Refrigerator
Amana ABB2224WES3 Bottom-Mount Refrigerator
Amana ABB2224WEW0 Bottom-Mount Refrigerator
Amana ABB2224WES0 Bottom-Mount Refrigerator
Showing 1-15
of 359
| Manufacturer Name: WHIRLPOOL Product Number: W10443313 OEM Part Number: W10443313 Product Description: Gasket |
Choose the best Home Appliance parts and supplies from HnKParts!
Same Day Shipping
Best Quality And Best Price
Wide Range of Inventory
Best Customer Service
Have More Questions or Need Help to Place The Order?
Reach us at (866)723-0907 or [email protected]
Write Your Own Review
Customer Questions
Installation Steps
Step1: Unplug refrigerator and remove items near door.
Step2: Remove old gasket by peeling from door liner carefully.
Step3: Align new gasket with groove and press firmly around perimeter.
Step4: Tighten any retaining screws if present and check seal alignment.
Step5: Restore power and ensure door closes tightly without air leaks.
