
Special Price
$63.59
Regular Price
$113.48
In stock
Available Quantity:
95
SKU
W10335333
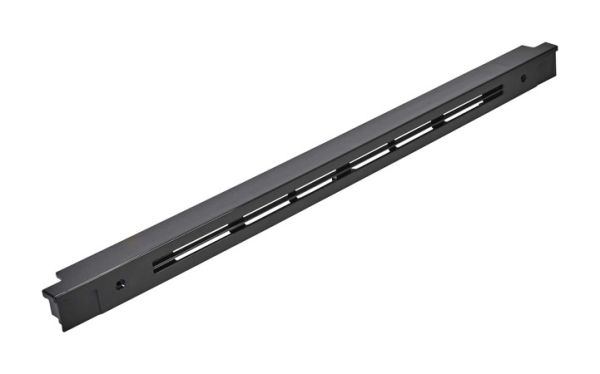
The Whirlpool W10335333 Range Door Vent Trim directs the heat and airflow from the oven to prevent the appliance from overheating for optimal cooking performance for the user. This trim helps to disperse hot air efficiently, so the appliance’s internal systems are not under strain. This helps in promoting air circulation which in turn helps in enhancing energy efficiency and safety when cooking as it will increase in better experience and reduce the chance of burning the range from the inside parts.
Manufacturer

This Part Fits the Following Models (145)
KitchenAid Electric Range WFI910H0AS1 WFI910H0AS1
KitchenAid Electric Range YKERS303BBL1 YKERS303BBL1
KitchenAid Electric Range YKERS303BSS1 YKERS303BSS1
KitchenAid Electric Range YKERS303BWH1 YKERS303BWH1
Whirlpool Gas Range WFG715H0ES0 WFG715H0ES0
Whirlpool Gas Range WFG715H0EH0 WFG715H0EH0
Whirlpool Gas Range WFG715H0EE0 WFG715H0EE0
Whirlpool WFG540H0AH0 30" Freestanding Gas Range
Whirlpool WFG540H0AE0 30" Freestanding Gas Range
Whirlpool WFG540H0AB0 30" Freestanding Gas Range
Whirlpool WFG540H0AW0 30" Freestanding Gas Range
Whirlpool WFG540H0AS0 30" Freestanding Gas Range
Whirlpool WFG714HLAS0 30" Freestanding Gas Range
Whirlpool WFG710H0AS0 30" Freestanding Gas Convection Range
Whirlpool WFG710H0AH0 30" Freestanding Gas Convection Range
Showing 1-15
of 145
| Manufacturer Name: WHIRLPOOL Product Number: W10335333 OEM Part Number: W10335333 Product Description: Trim-Vent |
Choose the best Home Appliance parts and supplies from HnKParts!
Same Day Shipping
Best Quality And Best Price
Wide Range of Inventory
Best Customer Service
Have More Questions or Need Help to Place The Order?
Reach us at (866)723-0907 or [email protected]
Write Your Own Review
Customer Questions
Installation Steps
Step1: Turn off power to the range and ensure all surfaces are cool before beginning to prevent electrical shock or burns.
Step2: Remove existing trim or vent by loosening mounting screws or release clips carefully.
Step3: Align new trim vent with existing mounting points on the range.
Step4: Secure with screws or clips, ensuring the trim sits level and firmly attached.
Step5: Restore power and test ventilation operation for proper airflow.
