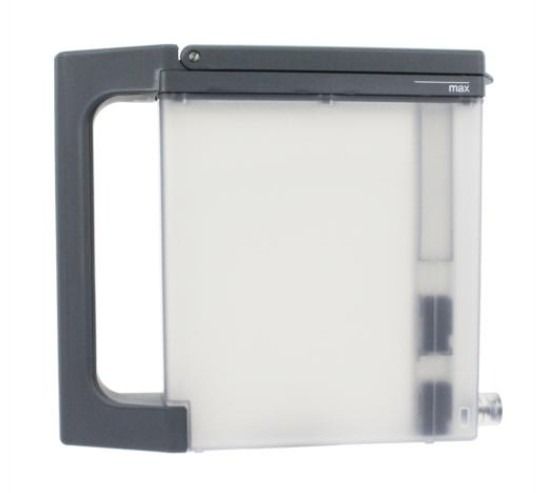
Bosch 00791032 Range Wall Oven Water Tank
Special Price
$101.56
Regular Price
$107.50
In stock
Available Quantity:
50
SKU
00791032
Product Description
The Bosch 00791032 Range Wall Oven Water Tank is made to supply the required steam for some cooking functions. It keeps water released into the oven during steam cooking to hold it, keeping food moist and adding to flavor. Refilling and cleaning are easy with the tank being easily removable. The compact design allows it to fit into the oven without taking up any space. This water tank helps with cooking results and makes cooking better, and baked dishes that are evenly cooked.
Manufacturer

✓ This Product Replaces:
664644, 742168