
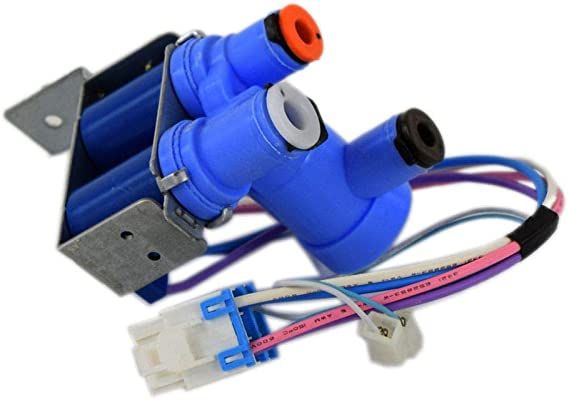
LG MJX41869208 Refrigerator Water Inlet Valve

Special Price $138.79 Regular Price $204.12
In stock
Available Quantity:   18
SKU
MJX41869208

Product Description

The LG MJX41869208 Refrigerator Water Inlet Valve regulates the water entering the ice maker and water dispenser system of the refrigerator. It is connected to the house water supply line and opens or closes depending on the commands of the control board of the refrigerator. Such a valve is normally fitted at the back of the refrigerator where the water lines come in.
Manufacturer

https://www.hnkparts.com/media/catalog/product/m/j/mjx41869208_lge_hnkparts.png

This Part Fits the Following Models (2)

Manufacturer Name: LGE
Product Number: MJX41869208
OEM Part Number: MJX41869208
Product Description: Valve-Water

Choose the best Home Appliance parts and supplies from HnKParts!

  • Same Day Shipping

  • Best Quality And Best Price

  • Wide Range of Inventory

  • Best Customer Service

Have More Questions or Need Help to Place The Order?
Reach us at (866)723-0907 or [email protected]

Write Your Own Review
You're reviewing:LG MJX41869208 Refrigerator Water Inlet Valve
Your Rating
Customer Questions
What maintenance is required for the LG MJX41869208 Water Inlet Valve?

Regularly inspect the refrigerator valve for leaks or mineral buildup. Clean the water line connections to ensure unobstructed flow. Check for proper sealing and tighten fittings as needed. This prevents water damage and ensures consistent ice and water supply.

What are common issues with the LG MJX41869208 Water Inlet Valve?

  • Water not dispensing properly.
  • Continuous dripping or leaking.
  • Ice maker not filling.
  • Valve failing to open or close correctly.

Installation Steps

Step1: Turn off refrigerator power and shut off water supply.

Step2: Remove access panel and disconnect old inlet valve water line and electrical connector.

Step3: Install new valve in same position, secure screws, reconnect water line and wiring.

Step4: Turn on water supply, restore power, check leaks and test dispenser carefully.

Step5: Wear gloves and ensure no electrical current during installation.

Step6: Tighten connections and run a short cycle to confirm proper operation.