The store will not work correctly in the case when cookies are disabled.
We collect user information to provide a better user experience and protect the security of our website. By continuing to use our website, you acknowledge the use of cookies.
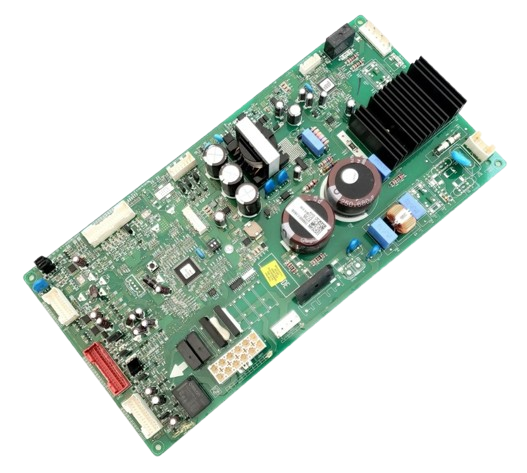
The LG EBR86093735 Refrigerator Main PCB Assembly is a replacement part used to handle and control the electronic features. It performs better by handling temperature and controlling the compressor. It receives sensory data from the different sources and changes it into commands that ensure proper cooling.
As part of the refrigerator's electronic control system, the LG EBR86093735 Refrigerator Main PCB Assembly is a main control board used in specified LG refrigerator applications. It contains the electronic circuitry and connections needed to support designated refrigerator control functions.
PCB Signal Processing:
Electrical information from refrigerator sensors, controls, and connected circuits is received and processed through the main PCB's electronic circuitry. The board evaluates these inputs according to the refrigerator's programmed control requirements and generates corresponding electrical signals for connected circuits and components.
Refrigerator Cycle Control:
During normal operation, the main PCB coordinates electronically controlled refrigerator functions according to programmed operating requirements. Its control activity supports functions such as cooling and defrost so that their associated components operate as part of the refrigerator's overall operating sequence.
Replacement Guidelines:
Replacement may be appropriate when the EBR86093735 is damaged or no longer performs its intended electronic control function. A correctly specified replacement restores the main PCB function required by the applicable refrigerator.
Common Failure Symptoms:
Refrigerator not cooling properly.
Refrigerator or freezer temperature becoming inconsistent.
The LG EBR86093735 Refrigerator Main PCB Assembly should be matched to the applicable LG refrigerator by verifying the complete refrigerator model number and part number EBR86093735 before purchase.
What maintenance is required for the LG EBR86093735 Main PCB Assembly?
Keep wiring organized and compartment clear to avoid signal interference. Confirm command selections register immediately. Verify temperature and cycle adjustments respond accurately and that all programmed functions operate consistently without unexpected interruptions.
What are common issues with the LG EBR86093735 Main PCB Assembly?
Settings not responding.
Display showing incorrect data.
Cycle functions failing.
Temperature control fluctuating.
How does a refrigerator main PCB know when a control response is needed?
It processes electrical information received from applicable sensors and control circuits to determine the required electronic response.
What is the difference between a refrigerator sensor and the main PCB?
A sensor provides operating information, while the main PCB processes that information and generates the corresponding control response.
Why does a refrigerator main PCB have multiple electrical connections?
Multiple connections provide pathways between the PCB and the refrigerator circuits and components associated with its control functions.
Can a refrigerator main PCB control more than one function?
Yes. A main PCB can coordinate multiple electronically controlled functions according to the refrigerator's programmed requirements.
What refrigerator part is LG EBR86093735?
LG EBR86093735 is a refrigerator main PCB assembly used in specified LG refrigerator applications.
Installation Steps
Step1: Unplug the refrigerator and open the rear service panel.
Step2: Label and disconnect wiring harnesses from the old PCB.
Step3: Unscrew and carefully remove the damaged control board.
Step4: Install new PCB, aligning with factory mounting points.
Step5: Reconnect all electrical connectors firmly and correctly.
Step6: Reassemble panel and test cooling system operation.