The store will not work correctly in the case when cookies are disabled.
We collect user information to provide a better user experience and protect the security of our website. By continuing to use our website, you acknowledge the use of cookies.
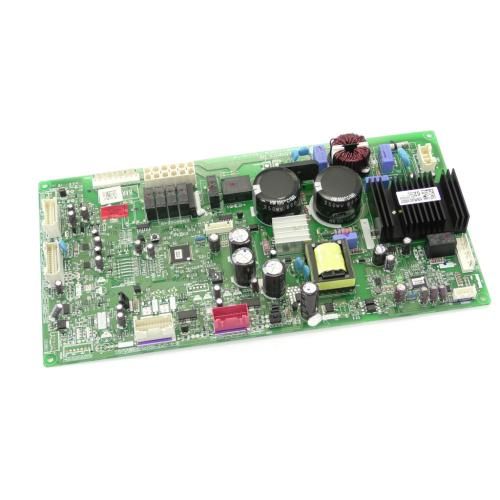
The LG EBR32165762 Refrigerator Main PCB Assembly is a replacement component that is usually found in refrigerators to control different electrical functions and ensure that the refrigerator runs optimally. This acts as the main switching node for regulating the cooling system, defrost cycle, etc. It operates by getting signals from the temperature sensors and regulating the operation of the compressor, fan, and defrost heater based on the signals.
A main PCB assembly provides the electronic circuitry used to manage multiple refrigerator functions. The LG EBR32165762 Refrigerator Main PCB Assembly is a central electronic control component used in specified LG refrigerators. It is installed within the refrigerator's electronic control area and forms part of the main control system that supports electronically managed appliance functions.
Output Control:
Generates electrical control signals based on processed operating information. These outputs support the operation of connected refrigerator components.
Component Communication:
Provides electronic communication between the main control circuitry and connected refrigerator components. This supports the exchange of operating information and control signals.
Replacement Guidelines:
Replacing the Refrigerator Main PCB Assembly is appropriate if it is damaged, malfunctioning, excessively worn, or otherwise deteriorated. Verify the LG part number EBR32165762 and the complete refrigerator model number before replacement. Replace the PCB assembly if deterioration affects signal processing, control outputs, electronic coordination, or normal refrigerator operation.
Fans or other controlled components operating abnormally.
Refrigerator operation becoming intermittent.
Equipment Compatibility:
The LG EBR32165762 Refrigerator Main PCB Assembly is intended for specific LG refrigerator configurations. The complete refrigerator model number should be matched with EBR32165762 using verified LG parts information or applicable manufacturer documentation before purchase.
What maintenance is required for the LG EBR32165762 Main PCB Assembly?
Regularly inspect PCB and wiring for secure attachment. Wipe away dust or moisture near the board. Test refrigerator functions to confirm proper response. Ensure mounting points are tight and aligned.
What are common issues with the LG EBR32165762 Main PCB Assembly?
Refrigerator not cooling properly.
Display or controls unresponsive.
Defrost cycles not initiating.
Fans operating irregularly.
What does the LG EBR32165762 control?
It provides electronic control support for multiple applicable refrigerator functions.
What does the EBR32165762 process?
It processes electrical signals from applicable sensors, switches, and other control components.
How does the EBR32165762 support refrigerator operation?
It generates electronic control outputs that coordinate connected refrigerator components.
What can indicate deterioration of the EBR32165762?
Inconsistent cooling, abnormal electronic functions, intermittent operation, or connected components responding incorrectly can indicate deterioration.
When should the LG EBR32165762 Refrigerator Main PCB Assembly be replaced?
The LG EBR32165762 may require replacement when the main PCB is confirmed to be faulty, damaged, or unable to properly control the refrigerator’s electronic functions.
Installation Steps
Step1: Disconnect the refrigerator from the power source.
Step2: Remove the back panel to access the PCB.
Step3: Carefully unplug all connectors attached to the old PCB.
Step4: Slide out the old PCB and place the new one in position.
Step5: Reattach all wiring connectors securely.
Step6: Reinstall the back panel.
Step7: Restore power and verify that all refrigerator functions work properly.