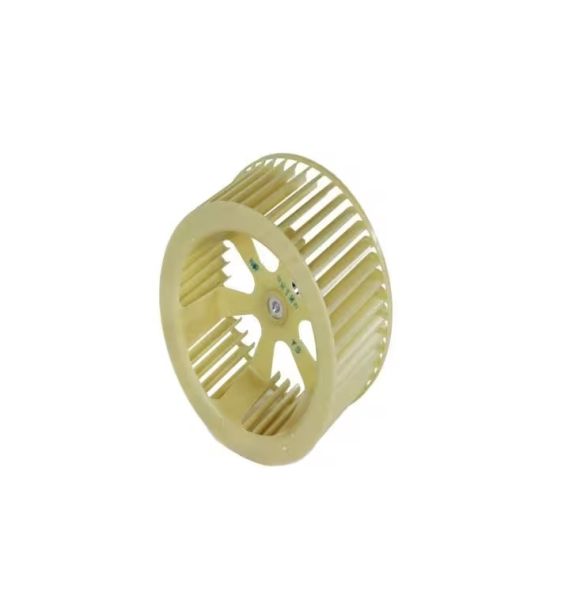
Hisense K1894024 Air Conditioner Lower Fan

Special Price $20.70 Regular Price $20.95
In stock
Available Quantity:   3
SKU
K1894024

Product Description

The Hisense K1894024 Air Conditioner Lower Fan is a replacement component for the cooling or ventilation. It has the primary purpose of propelling airflow that facilitates heat exchange and the general regulation of temperature. The mechanism comprises fan blades attached to a rotating hub, which, in the case of energizing, forces or draws air out of the lower vents. It is found in the bottom or lower interior part of the air conditioner and is attached by attaching it to the fan motor shaft and hooking the wiring harness.
Other Categories, HVAC Parts, Air Conditioner Parts
10.8"X11.25"X4.5"
Manufacturer
https://www.hnkparts.com/media/catalog/product/k/1/k1894024-36976.jpg
Write Your Own Review
You're reviewing:Hisense K1894024 Air Conditioner Lower Fan
Your Rating
Customer Questions
What maintenance is required for the Hisense K1894024 Lower Fan?

Regularly inspect the air conditioner fan for dust buildup and clean it using a soft brush or compressed air to maintain proper airflow. Ensure the unit is powered off before servicing to avoid electrical hazards. Check for loose mounting or worn components and secure them if needed. Regular maintenance supports maintaining cooling efficiency and reduces strain on the motor.

What are common issues with the Hisense K1894024 Lower Fan?

  • Accumulated dust is causing reduced airflow and an imbalance.
  • Unusual noises due to worn bearings or loose blades.
  • Fan not spinning or intermittent operation due to motor faults.
  • Vibration caused by misalignment or improper installation.
  • Reduced cooling performance linked to a restricted air conditioner.

Installation Steps

Step1: Disconnect Air Conditioner power supply and ensure unit is fully isolated.

Step2: Remove outer cover of air conditioner carefully using screwdriver.

Step3: Detach old lower fan assembly and note wiring positions.

Step4: Install new fan aligning mount points and secure firmly.

Step5: Reconnect wiring as per original configuration safely.

Step6: Restore cover and test unit for smooth operation.