The store will not work correctly in the case when cookies are disabled.
We collect user information to provide a better user experience and protect the security of our website. By continuing to use our website, you acknowledge the use of cookies.
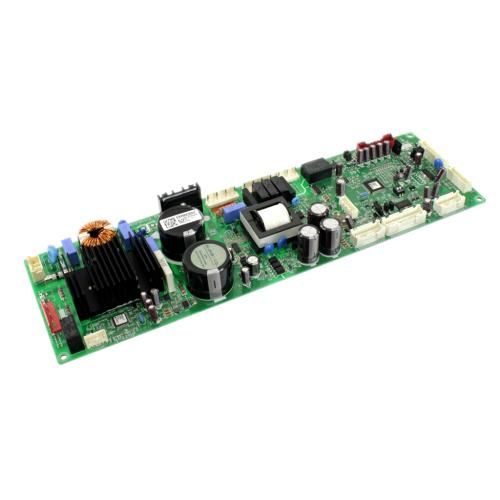
The LG EBR88309752 Refrigerator PCB Main Control Board is a replacement part that is used to handle electrical functions. It works by taking in and sending signals to different parts of the refrigerator, such as the compressor and fan motors that everything functions properly and the refrigerator stays at the right temperature.
Provides the central electronic control platform for connected refrigerator components and electrically controlled functions. The LG EBR88309752 Refrigerator PCB Main Control Board PCB Assembly processes applicable operating signals and produces corresponding control outputs for the refrigerator's electronic system. It supports coordinated operation of connected components involved in cooling and other electronically managed functions.
System Operation:
Coordinates control information with components involved in refrigerator operation, including the compressor and fan motors. The board communicates electronic control signals according to information received from the refrigerator's control system, supporting coordinated cooling-system operation.
Replacement Guidelines:
Replacing the Refrigerator PCB Main Control Board PCB Assembly if it is damaged, malfunctioning, excessively worn, or otherwise deteriorated. The part number EBR88309752 should be verified before replacement to ensure the correct control board is selected. Replace the board if deterioration affects signal processing, control outputs, compressor operation, fan operation, or normal refrigerator operation.
Verify that LG part number EBR88309752 matches the equipment documentation before purchasing. Confirm the applicable refrigerator configuration, PCB specifications, and manufacturer parts information. The complete refrigerator model number should be matched with the part number to confirm the intended application.
What maintenance is required for the LG EBR88309752 PCB Main Control Board?
Keep the PCB clean and dry. Remove dust using a soft brush. Make sure all wiring connections remain seated. Operate the refrigerator normally to allow signals to flow between sensors, controls, and cooling components.
What are common issues with the LG EBR88309752 PCB Main Control Board?
Temperature settings do not respond.
Fans operate irregularly.
Error codes appearing unexpectedly.
Compressor does not run consistently.
What does the LG EBR88309752 main control board do?
It manages system logic and electronic control signals for applicable LG refrigerators, coordinating communication with connected refrigerator components.
What does the EBR88309752 process?
The main control board processes electrical signals from applicable refrigerator sensors and control components and generates corresponding control outputs.
Can the EBR88309752 affect refrigerator temperature control?
Yes. Because the main control board coordinates electronic control signals for cooling-related components, a problem with the board can affect temperature regulation and cooling operation.
How do you maintain the LG EBR88309752 Refrigerator Main Control Board Assembly?
Inspect the control board and its connections during appliance service for visible damage, loose connections, corrosion, or signs of overheating.
What are common signs of a problem with the EBR88309752?
Common signs include unresponsive temperature settings, irregular fan operation, inconsistent compressor operation, unexpected error indications, and multiple electronic control issues.
Installation Steps
Step1: Unplug the refrigerator to ensure safety.
Step2: Remove the rear access panel to locate the main PCB.
Step3: Disconnect all wiring harnesses carefully, noting their positions.
Step4: Unscrew and remove the old PCB.
Step5: Install the new PCB, secure with screws, and reconnect all wires.
Step6: Replace the panel, restore power, and test cooling functions.