The store will not work correctly in the case when cookies are disabled.
We collect user information to provide a better user experience and protect the security of our website. By continuing to use our website, you acknowledge the use of cookies.
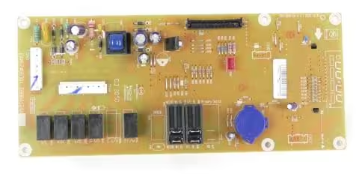
The LG EBR84124402 Microwave PCB Main Control Board controls the operations of the microwave including heating, timing and power settings of the board. It functions through analyzing signals from inputs by the users and controlling the power supply to the magnetron of the microwave, among other things. It also helps in regulation of energy usage to avoid the system heating up and consequently developing a problem.
What maintenance is required for the LG EBR84124402 PCB Assembly?
Ensure the microwave is unplugged before inspection. Keep the PCB clean and free of moisture, food spills, or grease. Avoid touching components directly with hands to avoid static damage. Check connections periodically for secure seating and corrosion.
What are common issues with the LG EBR84124402 PCB Assembly?
Microwave fails to start or respond.
Display or touchpad malfunctions
Erratic cooking times or incomplete cycles.
Burnt smells or visible damage on the board.
Installation Steps
Step1: Disconnect power and unplug microwave for safety.
Step2: Remove outer cover and discharge capacitor safely.
Step3: Label and disconnect wiring harness from old board.
Step4: Install new board and secure screws.
Step5: Reconnect wiring, reassemble unit, test operation carefully.