
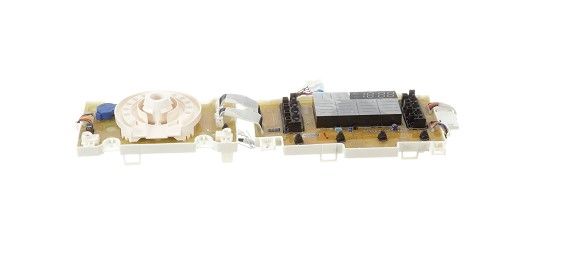
LG EBR78898213 Washer Display PCB Assembly

Special Price $196.59 Regular Price $246.95
In stock
Available Quantity:   15
SKU
EBR78898213

Product Description

The LG EBR78898213 Washer PCB Assembly is used to control of the wash cycles because it is responsible for the power supply and signal control. It takes user inputs and controls motor, pump, and sensor operations to achieve the better performance. advanced electronics control the functions of the circuit and adapts the water level and spinning speed to the load.
Manufacturer

https://www.hnkparts.com/media/catalog/product/e/b/ebr78898213-78632.jpg

This Part Fits the Following Models (5)

Manufacturer Name: LGE
Product Number: EBR78898213
OEM Part Number: EBR78898213
Product Description: Pcb Assy

Choose the best Home Appliance parts and supplies from HnKParts!

  • Same Day Shipping

  • Best Quality And Best Price

  • Wide Range of Inventory

  • Best Customer Service

Have More Questions or Need Help to Place The Order?
Reach us at (866)723-0907 or [email protected]

Write Your Own Review
You're reviewing:LG EBR78898213 Washer Display PCB Assembly
Your Rating
Customer Questions
What maintenance is required for the LG EBR78898213 Display PCB Assembly?

Regularly inspect the washer display PCB assembly for dust, moisture, or loose connections. Keep the area dry and clean to prevent short circuits. Ensure the wiring harness is secure and avoid exposure to excessive vibration or spills to maintain accurate operation.

What are common issues with the LG EBR78898213 Display PCB Assembly?

  • Display not turning on or flickering.
  • Buttons becoming unresponsive.
  • Error codes appearing erroneously.
  • Communication failures with the washer control board.

Installation Steps

Step1: Unplug washer and turn off water supply before servicing to ensure safety.

Step2: Remove top or front panel screws and access control housing carefully using proper tool.

Step3: Disconnect wiring harness from old PCB assembly, noting and labeling connections.

Step4: Install new PCB, align pins, reconnect harness securely.

Step5: Reassemble panel, restore power, and test display operation by running a short wash cycle.