The store will not work correctly in the case when cookies are disabled.
We collect user information to provide a better user experience and protect the security of our website. By continuing to use our website, you acknowledge the use of cookies.
Observance of Independence day July 4th we are closed [No shipping's and deliveries ] on 07/03/2026, Orders received after 3.00pm CST on 07/02/2026 will be shipping out on Monday 07/06/2026
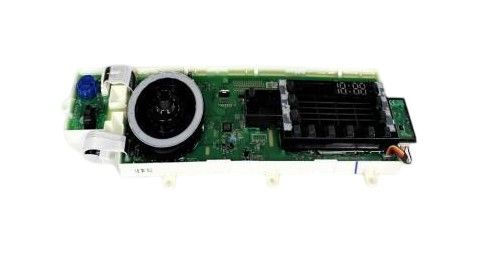
The LG EBR78538807 Washer Display-Power Control Board (PCB Assembly), the user controls connect to the washer's internal components by sending necessary signals to maintain proper operation. The board receives information from display inputs to control power distribution throughout the washer machine components including the motor and water pump. Users can make reliable operation and prevent further issues in the machine by installing this assembly to replace a malfunctioning board.
What maintenance is required for the LG EBR78538807 Display Power Control Board Assembly?
To maintain the control board assembly, ensure the washer is kept in a dry, well-ventilated area to prevent moisture damage. Regularly inspect wiring connections for looseness or corrosion. Avoid power surges by using a surge protector. Always disconnect power before servicing.
What are common issues with the LG EBR78538807 Display Power Control Board Assembly?
Unresponsive or blank display panel.
Washer not powering on.
Error codes appearing intermittently.
Inconsistent cycle operation.
Buttons not responding properly.
Failure to start or complete cycles.
Installation Steps
Step1: Disconnect washer from power and water supply for safety.
Step2: Remove top/rear panel using proper tool carefully and set aside.
Step3: Locate and label wiring harness on old control board before unplugging connectors.
Step4: Install new board and reconnect harness securely in correct ports.
Step5: Reassemble panels and restore power to test operation carefully.