The store will not work correctly in the case when cookies are disabled.
We collect user information to provide a better user experience and protect the security of our website. By continuing to use our website, you acknowledge the use of cookies.
Observance of Independence day July 4th we are closed [No shipping's and deliveries ] on 07/03/2026, Orders received after 3.00pm CST on 07/02/2026 will be shipping out on Monday 07/06/2026
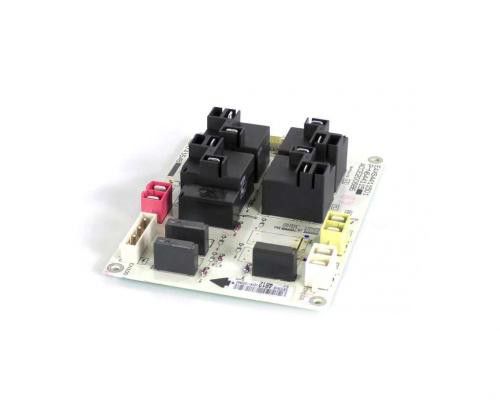
The LG EBR74164812 Range Power-Control Board PCB-Assembly controls the electrical current to the several components of the appliance to facilitate the efficient functioning of the heating coils, oven, and other aspects. This power control board assists in controlling the temperature and ensures that the appliance does not overload or develop faults. Some of the advantages of the invention include enhanced performance of the range, efficiency in energy usage, and durability of the appliance.
What maintenance is required for the LG EBR74164812 PCB Assembly?
Confirm voltage supply stability during cooking operations. Inspect connectors for firm attachment and monitor response when selecting high-power settings. Ensure adequate ventilation around the board housing, and turn off electrical power before performing internal inspections.
What are common issues with the LG EBR74164812 PCB Assembly?
Power not reaching heating elements.
Temperature control becoming unstable.
System not powering on consistently.
Burners heating at incorrect levels.
Installation Steps
Step1: Turn off the electrical supply to the appliance.
Step2: Access the control compartment by removing the rear cover.
Step3: Detach connectors from the current PCB assembly.
Step4: Release mounting screws and remove the board.
Step5: Install the new PCB and reconnect all wiring.
Step6: Secure the cover and restore power to verify operation.