The store will not work correctly in the case when cookies are disabled.
We collect user information to provide a better user experience and protect the security of our website. By continuing to use our website, you acknowledge the use of cookies.
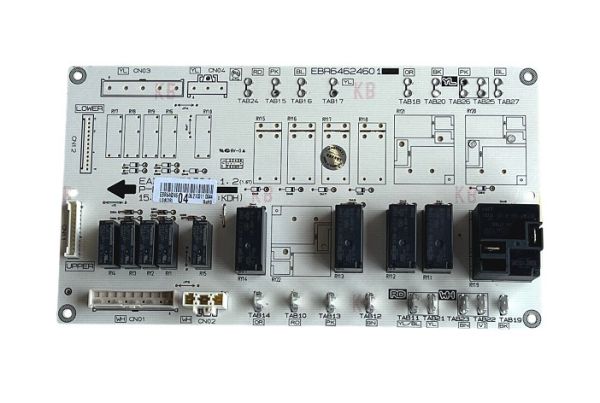
The LG EBR64624604 Oven PCB Power Assembly is designed for the electrical control of the oven the distribution of power to the various components control of the voltage, and the supply of energy to the heaters, fans, and control panels for the proper functioning of the oven. This PCB controls the power levels and ensures that the temperatures are constant to avoid any fluctuations that may have an impact on cooking and helps in the exchange of information between the sensors and the controls to make adjustments according to the setting.
What maintenance is required for the LG EBR64624604 PCB Power Assembly ?
Keep the oven interior and control area clean to prevent dust, grease, and moisture from reaching the PCB. Ensure the appliance is properly ventilated and avoid exposure to high humidity or heat buildup. Periodically check wiring connections for tightness and signs of wear or corrosion. Proper care helps maintain stable electrical operation and reduces the likelihood of malfunctions.
What are common issues with the LG EBR64624604 PCB Power Assembly ?
Oven fails to power on or experiences intermittent shutdowns.
Unresponsive or malfunctioning control panel.
Incorrect temperature regulation or heating inconsistencies.
Error codes displayed on the interface.
Burnt components or visible electrical damage on the board.
Installation Steps
Step1: Disconnect power supply and ensure oven is cool before starting.
Step2: Remove rear panel and locate faulty PCB assembly.