
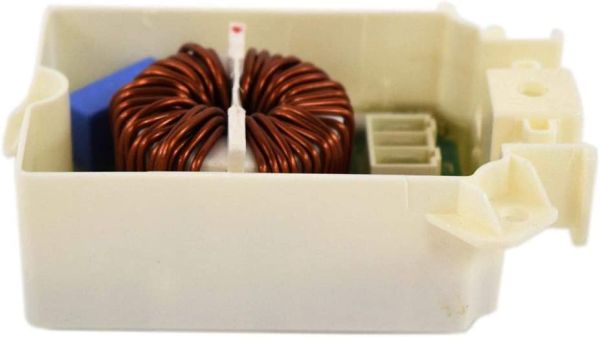
LG EAM60930603 Washer Filter Assembly

Special Price $86.22 Regular Price $102.64
In stock
Available Quantity:   1
SKU
EAM60930603

Product Description

This LG EAM60930603 Filter Assembly removes lint, debris, and other foreign particles to allow the washing machine to run smoothly and designed to be installed into compatible washers and helps to avoid clogging and enhance the draining process and works by trapping lint and residues during the wash cycle to avoid the formation of a layer that may affect its performance and help to regulate the flow of water and prevent pressure on the pump. Daily usage helps in improving the efficacy of washing and avoiding unpleasant smells.
Manufacturer

https://www.hnkparts.com/media/catalog/product/e/a/eam60930603_lge_hnkparts.png
Manufacturer Name: LGE
Product Number: EAM60930603
OEM Part Number: EAM60930603
Product Description: Filter Assy

Choose the best Home Appliance parts and supplies from HnKParts!

  • Same Day Shipping

  • Best Quality And Best Price

  • Wide Range of Inventory

  • Best Customer Service

Have More Questions or Need Help to Place The Order?
Reach us at (866)723-0907 or [email protected]

Write Your Own Review
You're reviewing:LG EAM60930603 Washer Filter Assembly
Your Rating
Customer Questions
What maintenance is required for the LG EAM60930603 Filter Assembly?

Regularly inspect and clean the washer filter assembly to remove lint, debris, and buildup that can restrict water flow. Rinse it under running water and ensure it is securely reinstalled. Proper maintenance helps prevent drainage issues and ensures efficient washer operation.

What are common issues with the LG EAM60930603 Filter Assembly?

  • Clogging due to lint, coins, or debris buildup.
  • Reduced water drainage or slow draining cycles.
  • Unusual noise during operation from trapped objects.
  • Leakage caused by improper installation or damaged filter housing.

Installation Steps

Step1: Unplug washer and shut off main water supply before starting

Step2: Open access panel on washer and locate old filter assembly

Step3: Carefully remove the existing filter, noting its orientation and sealing position

Step4: Insert new filter securely into housing until fully seated

Step5: Reattach panel, restore power and water, then run rinse cycle to check for leaks

Step6: Wear gloves and ensure unit is completely powered off before servicing