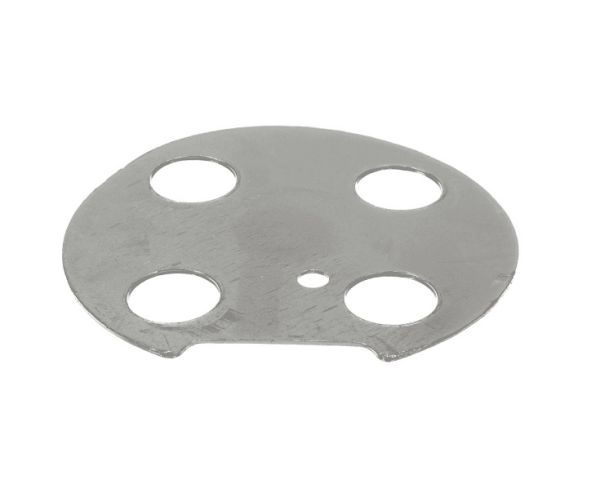
The Samsung DE81-07024A Range Service Gasket Dual Burner is an essential replacement component for your Samsung range. Its unique design creates a tight seal between the cooktop and burner, stopping leaks and guaranteeing your range runs smoothly. A malfunctioning gasket may cause some issues, such as uneven cooking, gas leaks, and even harm to your range. Uneven cooking can greatly affect your cooking experience, and these leaks might be a safety risk. Your appliance's performance and safety may be restored by replacing a worn-out gasket with the Samsung DE81-07024A, which ensures uniform heat distribution and guards against any dangers. Because it is composed of sturdy, heat-resistant stainless steel, you can be sure that it will work for a long time even at the high temperatures of your range.
Step 1: Collect Your Tools – Prior to initiating the replacement for the Samsung DE81-07024A SVC-GASKET DUAL BURNER, it is crucial for all required tools and materials to be assembled. A screwdriver, pliers, a new gas supply line, and a burner gasket will be required.
Step 2: Disconnect the range – For safety precautions, it is vital for the range to be disconnected before proceeding with any repairs. Electrical shock will be prevented and the risk of injury minimized by this step.
Step 3: Take Off the Burner – It’s now time for the current burner to be detached. Your screwdriver should be utilized to unscrew the fasteners that secure the burner and it should be gently lifted away from the range.
Step 4: Position the New Burner Gasket – The new burner gasket should be set onto the burner and it should ensure that it is firmly in place. After that, the burner should be reattached to the range with the screws.
Step 5: Attach the Gas Supply Line – The gas supply line should be grabbed and linked to the burner. Confirmation that both ends of the line are tightly secured should be made.
Step 6: Verify the Burner – Before considering your repair finished, it is essential for the burner to be verified. Its functionality should be checked by turning it on and off several times. If all operates correctly, then your replacement is complete!
Please remember, these instructions are served as general guidance and should always be utilized alongside the manufacturer's manual, if available.