The store will not work correctly in the case when cookies are disabled.
We collect user information to provide a better user experience and protect the security of our website. By continuing to use our website, you acknowledge the use of cookies.
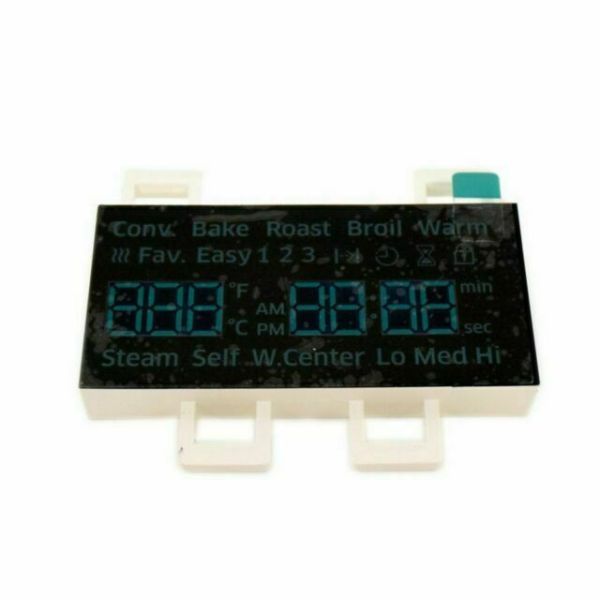
The Samsung DE07-00129A Range Oven LED Display Board enables the user to easily read the temperature and the function of the oven for effective cooking. It translates signals received from the control board into visible digital signals. Adjustable buttons enable the user to control the temperature and the cooking modes with ease. This display also improves user convenience because it allows for monitoring the functions of the oven.
Step 1: Your oven should be disconnected from the power supply.
Step 2: The screws securing the handle should be taken out, along with those on the sides and bottom of the control panel. The control panel should be gently pulled to detach.
Step 3: The back cover of the display should be removed. A few screws should be visible on the rear side of the display. These screws should be extracted and the back cover should be carefully pried off using needle nose pliers.
Step 4: The display cable should be gently detached by pulling it out.
Step 5: The old display should be removed by unscrewing any screws that are keeping it secured.
Step 6: The new display should be placed in position and the display cable should be reconnected.
Step 7: The back cover should be reattached, ensuring all screws are tightened properly.
Step 8: The control panel should be reinstalled, verifying that all screws are firmly tightened.
Step 9: Your oven should be reconnected to the power and the functionality of the new display should be checked.
If these steps were executed accurately, your new display should be operational.
Please note that these instructions serve as general guidance and should always be used alongside the manufacturer's manual, if one is available.