The store will not work correctly in the case when cookies are disabled.
We collect user information to provide a better user experience and protect the security of our website. By continuing to use our website, you acknowledge the use of cookies.
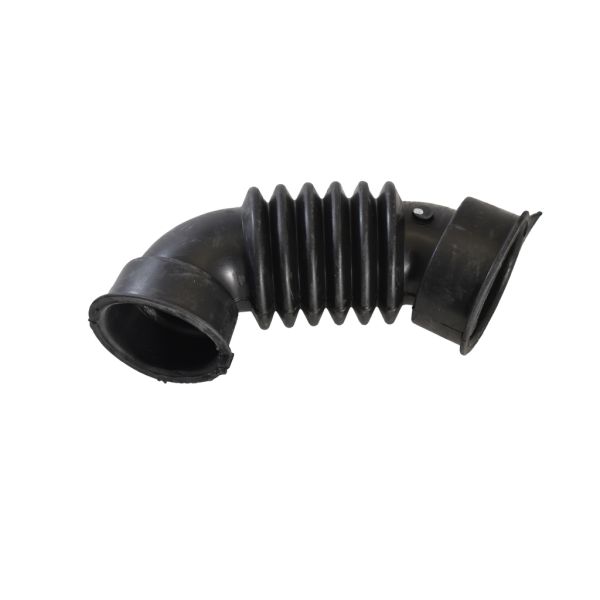
The Samsung DC67-00467A Hose-Drawer Tub is a replacement item made for Samsung washer-dryer combinations. During the washing process, it is essential to direct water drainage from the washer to the dryer. This part is made of sturdy plastic to last a long time and resist frequent use. To stop leaks and keep your Samsung washer-dryer combo operating at its best, you must replace any worn-out or broken Hose-Drawer Tub. An inefficient drainage system from a malfunctioning Hose-Drawer Tub may result in water build-up inside the washer and eventual appliance failure. You can prevent water damage to your washer-dryer combo and ensure smooth performance by making sure this part is in good shape.
Step 1: The washer is disconnected from the electrical outlet and the water valves that feed the washer are turned off.
Step 2: The washer is pulled away from the wall and the screws securing the back panel are taken out.
Step 3: The DC 67-00467A hose drawer is identified and all hoses linked to it are detached.
Step 4: The two screws that fasten the DC 67-00467A hose drawer are taken out.
Step 5: The old hose drawer is gently slid out of the washer and placed aside.
Step 6: The new hose drawer is inserted into the washer and fastened with the two screws that were previously removed.
Step 7: All hoses are reconnected to the new hose drawer.
Step 8: The back panel of the washer is reattached, securing it with the screws that were previously taken out.
Step 9: The washer is plugged back into the power source and the water valves are opened.
Step 10: The washer is verified to operate correctly before usage.
Please remember that these instructions are intended for general reference and should always be utilized alongside the manufacturer's manual, if available.