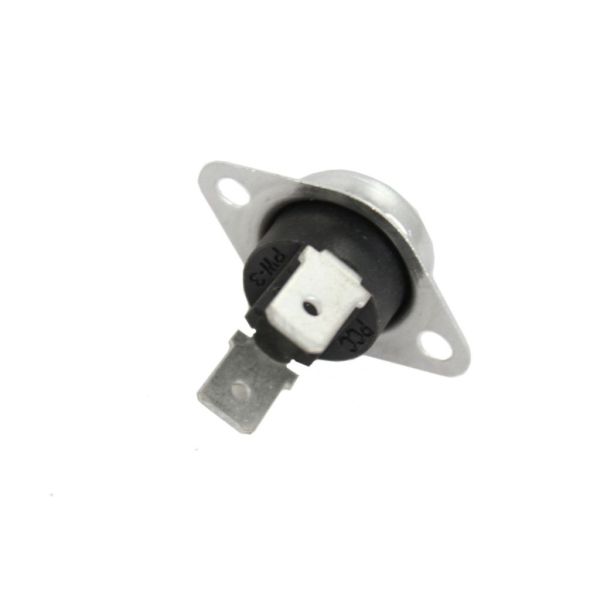
This Part Fits the Following Models (511)
Samsung Dryer Thermostat Assembly DC47-00016A
The Samsung Dryer Thermostat Assembly DC47-00016A is an essential component that regulates the temperature within Samsung dryers, ensuring optimal drying performance while protecting against overheating. Crafted with accuracy and durability, this component includes a high-quality thermostat that correctly monitors the dryer's interior temperature. The DC47-00016A thermostat assembly, designed to fulfill strict quality standards, smoothly fits into Samsung dryers, ensuring dependable and efficient operation. Their durable structure and thorough design ensure long-term functionality. The thermostat assembly is critical in ensuring that the dryer operates safely, preventing potential hazards such as fires or fabric damage. These sophisticated control mechanisms maintain consistent temperatures throughout the drying process, allowing for thorough and efficient drying of laundry goods.
Key Features for Samsung Dryer Thermostat Assembly DC47-00016A
-
Genuine Samsung Part: Specifically designed for Samsung dryer models, ensuring compatibility and peak performance.
-
Temperature regulation: The maintenance of stable temperatures during the drying cycle, resulting in more effective drying output.
-
Safety Features: The dryer has built-in safety features to avoid overheating and safeguard it from harm.
-
Installation is simple: allowing for the convenient repair of worn or damaged thermostat assemblies.
Installation Steps
Step 2: The back panel of the dryer is taken off by loosening the screws with a Phillips head screwdriver.
Step 3: The thermal fuse is identified, which is generally found near the heating element at the rear of the dryer.
Step 4: The wire connections are detached from the thermal fuse using a flat-head screwdriver or pliers.
Step 5: The mounting bracket is removed and the thermal fuse is gently extracted from the dryer.
Step 6: The new thermal fuse is placed into the dryer, the bracket is attached, and the wire connections are reconnected.
Step 7: The back panel of the dryer is reinstalled and fastened with the screws.
Step 8: The dryer is reconnected to the power supply and the timer is reset to verify your repair.
Step 9: All connections are ensured secure before operating the dryer.
Please be aware that these instructions are served as general guidance and should always be utilized alongside the manufacturer's manual, if available.
