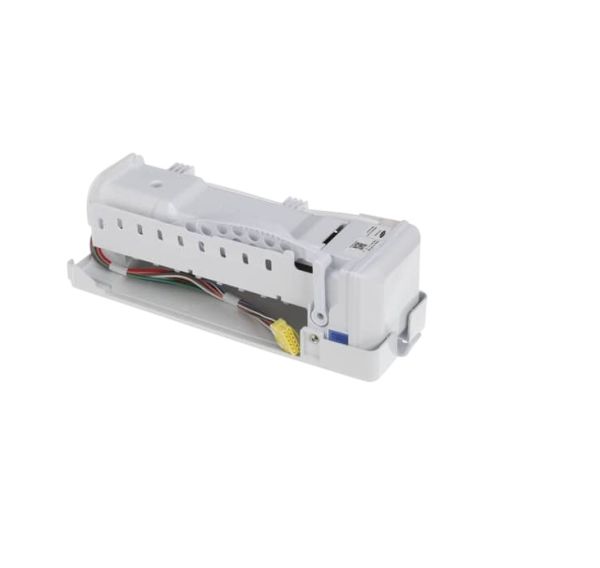
This Part Fits the Following Models (29)
Samsung Ice Maker Assembly DA97-07365G
The Samsung Ice Maker Assembly DA97-07365G represents cutting-edge innovation and functionality in household appliance design. This assembly, designed with painstaking attention to detail, exemplifies Samsung's dedication to quality and dependability. This is designed to fit easily into compatible refrigerator models and has a sleek and modern look that will complement any kitchen decor. This assembly, which is equipped with innovative ice-making technology, produces a consistent supply of crystal-clear ice cubes, guaranteeing that your beverages are always deliciously cooled. Its efficient functioning reduces energy consumption while increasing ice output, making it an eco-friendly option for ecologically conscious customers. The Samsung Ice Maker Assembly DA97-07365G is designed for simple installation and maintenance, making it easier to keep your refrigerator in good working order.
Key Features for Samsung Ice Maker Assembly DA97-07365G
-
Genuine Samsung Part: Specifically designed for Samsung refrigerators, assuring compatibility and peak performance.
-
Easy Installation: A simple installation technique for replacing outdated or defective ice machine assemblies.
-
Produces High-Quality Ice: Provides clear and refreshing ice cubes, which are great for keeping beverages chilled.
-
Durable: Made from long-lasting materials that can withstand the demands of everyday use.
-
Improved Efficiency: Maintains a consistent supply of ice, minimizing the need for frequent refills and ensuring user convenience.
Installation Steps
Step 2: The ice maker assembly located within the freezer compartment should be identified, typically positioned in the upper right corner.
Step 3: Any food or belongings situated near the ice maker should be cleared away by being removed from the refrigerator.
Step 4: With a screwdriver, the mounting screws that hold the ice maker assembly against the side of the freezer wall should be gently detached and placed aside.
Step 5: The ice maker should be carefully elevated off the support bracket.
Step 6: The electrical connections and water supply line attached to the rear of the old ice maker should be unscrewed.
Step 7: The new ice maker should be taken and positioned properly with the mounting bracket in the freezer.
Step 8: It should be fastened using the screws that were set aside from the old ice maker.
Step 9: The electrical connections and water supply line should be reattached.
Step 10: Power should be restored to the refrigerator and your ice maker should be checked to ensure it is functioning correctly.
And you’re finished! Well done on completing this repair.
Please remember that these instructions serve as general guidance and should always be referenced alongside the manufacturer's manual, if available.
