The store will not work correctly in the case when cookies are disabled.
We collect user information to provide a better user experience and protect the security of our website. By continuing to use our website, you acknowledge the use of cookies.
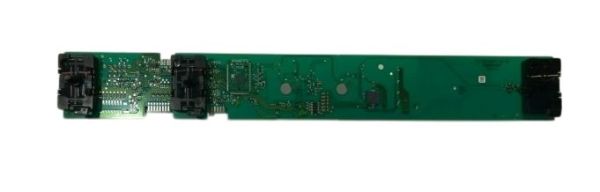
The Speed Queen D518382 Dryer Control Board 6-Cycle is an electronic component that controls the working settings of the appliance. It operates by decoding the user inputs and transmitting electrical impulses to the parts of the machine, like the motor, heater and sensors, so that they can control the cycle. It is placed in the control console and is connected to wiring harnesses and interface elements, which organize all functions to ensure drying performance.
What maintenance is required for the Speed Queen D518382 Control Board?
Periodically inspect the dryer control board for dust buildup, moisture, or loose connections. Ensure the dryer is unplugged before cleaning or checking. Avoid spilling liquids near the board. Proper inspection assists in avoiding electrical shorts and ensures accurate cycle selection.
What are common issues with the Speed Queen D518382 Control Board?
Unresponsive or erratic cycle selection.
Dryer not starting or stopping mid-cycle.
Error codes displayed due to faulty sensors.
Burnt components from power surges.
Intermittent operation of heating elements.
Installation Steps
Step1: Disconnect dryer from power supply to prevent electric shock verify no voltage present.
Step2: Remove top or rear panel to access control board housing.
Step3: Note wiring connections before removal.
Step4: Disconnect all wire harnesses and unfasten mounting screws.
Step5: Install new control board and reconnect harnesses to matching terminals.
Step6: Reassemble panels, restore power, and test cycles before normal use.