
Special Price
$150.91
Regular Price
$191.97
In stock
Available Quantity:
15
SKU
D518191
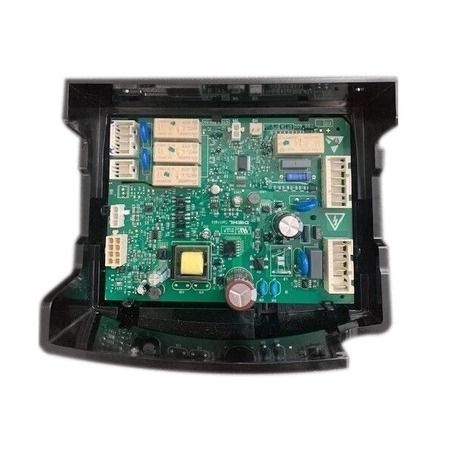
The Speed Queen D518191 Output Control Board is designed to control the dryer’s operations effectively and enhance the dryer’s performance this board controls the heat level, the drying time, and the cycle settings, and runs automatically and receives input signals and controls the power supply, ensures proper coordination between the dryer components hence improve functionality and decreases the frequency of maintenance.
Manufacturer

This Part Fits the Following Models (14)
Speed Queen ADE3SRGS175TW01-START-S#2001000001 Dryer
Speed Queen ADE4BRGS175TW01 START S#2001000001 Dryer
Speed Queen ADE4BRGS176TW01 START S#2001000001 Dryer
Speed Queen ADE3SRGS177TW01-START-S#2001000001 Dryer
Speed Queen ADEE9RYS177TW01-START-S#2001000001 Dryer
Speed Queen ADE4BRGS177TW01 START S#2001000001 Dryer
Speed Queen ADE6HRYS177TW01 START S#2001000001 Dryer
Speed Queen ADG3SRGS115TW01-START-2001000001 Dryer
Speed Queen ADG3SRGS117TW01-START-S#2001000001 Dryer
Speed Queen ADG4BRGS115TW01-START-S#2001000001 Dryer
Speed Queen ADG4BRGS117TW01-START-S#2001000001 Dryer
Speed Queen ADG4BRGS116TW01-START-S#2001000001 Dryer
Speed Queen ADG6HRYS117TW01-START-S#2001000001 Dryer
Speed Queen ADGE9RYS117TW01-START-S#2001000001 Dryer
| Manufacturer Name: SPEED QUEEN Product Number: D518191 OEM Part Number: D518191 Product Description: Dryer Output Control |
Choose the best Home Appliance parts and supplies from HnKParts!
Same Day Shipping
Best Quality And Best Price
Wide Range of Inventory
Best Customer Service
Have More Questions or Need Help to Place The Order?
Reach us at (866)723-0907 or [email protected]
Write Your Own Review
Customer Questions
Installation Steps
Step1: Disconnect power and shut off dryer before accessing control panel to avoid electrical shock.
Step2: Remove top or rear panel and carefully label all wire connections on the old board.
Step3: Unplug connectors and unscrew the faulty control board.
Step4: Mount the new board in the same position and reconnect wiring securely.
Step5: Reassemble panels, restore power, and run a test cycle to confirm proper operation.
