
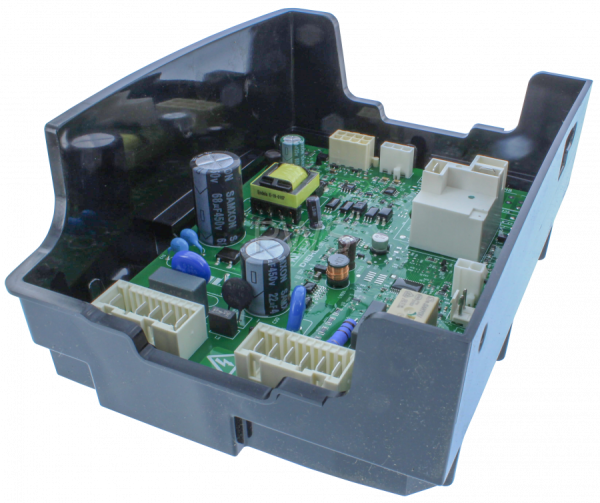
Speed Queen D517191P Dryer Output Control Board

Special Price $140.78 Regular Price $173.95
In stock
Available Quantity:   74
SKU
D517191P

Product Description

The Speed Queen D517191P Dryer-Output Control Board manages the operation of various dryer functions by regulating electrical signals to key components.It is a model that fits in certain models of Speed Queen dryers and acts as the core of the control system of the appliance.
Manufacturer

✓ This Product Replaces: D517191
https://www.hnkparts.com/media/catalog/product/d/5/d517191p_speed-queen_hnkparts.png
Manufacturer Name: SPEED QUEEN
Product Number: D517191P
OEM Part Number: D517191P
Product Description: Dryer Output Control

Choose the best Home Appliance parts and supplies from HnKParts!

  • Same Day Shipping

  • Best Quality And Best Price

  • Wide Range of Inventory

  • Best Customer Service

Have More Questions or Need Help to Place The Order?
Reach us at (866)723-0907 or [email protected]

Write Your Own Review
You're reviewing:Speed Queen D517191P Dryer Output Control Board
Your Rating
Customer Questions
What maintenance is required for the Speed Queen D517191P Control Board?

Inspect the dryer control board periodically for signs of burn marks or loose connections. Keep the area free from dust and moisture to avoid electrical issues. Always disconnect power before handling. Proper support ensures accurate dryer performance and avoids malfunctions.

What are common issues with the Speed Queen D517191P Control Board?

  • Dryer fails to start or heat.
  • Erratic or unresponsive control functions.
  • Burnt components or visible damage on the board.
  • Intermittent operation due to loose connections.

Installation Steps

Step1: Unplug dryer and turn off power supply to avoid electric shock.

Step2: Remove rear or top panel using the proper tool.

Step3: Locate and disconnect wires from the old control board.

Step4: Unscrew and remove the faulty board carefully.

Step5: Install the new board, securing it with screws.

Step6: Reconnect wires firmly as per original positions.

Step7: Reattach panel, restore power, and test dryer operation.