
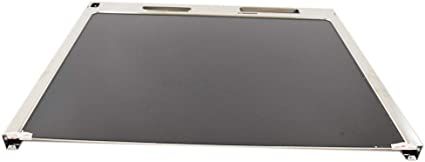
LG AGU75049009 Range Upper Plate Assembly

Special Price $417.39 Regular Price $503.95
In stock
Available Quantity:   2
SKU
AGU75049009

Product Description

The LG AGU75049009 Range Upper Plate Assembly helps to distribute heat evenly and cook food effectively. This serves as a cover for the burner area while at the same time permitting efficient heat conduction for cooking. It is well-fixed in place and is resistant to high temperatures. It ensures that the heat is evenly distributed and also improves the performance of the appliance in the kitchen.
Manufacturer

✓ This Product Replaces: AGU75049004
https://www.hnkparts.com/media/catalog/product/a/g/agu75049009_lge_hnkparts.png

This Part Fits the Following Models (3)

Manufacturer Name: LGE
Product Number: AGU75049009
OEM Part Number: AGU75049009
Product Description: Plate Assy-Upper

Choose the best Home Appliance parts and supplies from HnKParts!

  • Same Day Shipping

  • Best Quality And Best Price

  • Wide Range of Inventory

  • Best Customer Service

Have More Questions or Need Help to Place The Order?
Reach us at (866)723-0907 or [email protected]

Write Your Own Review
You're reviewing:LG AGU75049009 Range Upper Plate Assembly
Your Rating
Customer Questions
What maintenance is required for the LG AGU75049009 Upper Plate Assembly?

Keep the surface free from grease and food residue. Inspect mounting points and screws to ensure the plate is secure. Check that burners or elements are properly seated on the plate to maintain even heating and safe cooking operation.

What are common issues with the LG AGU75049009 Upper Plate Assembly?

  • Burners not seating properly.
  • Uneven heat distribution.
  • Plate shifting under cooking load.
  • Control knobs not aligning with burners.

Installation Steps

Step1: Switch off power and remove all items from the range.

Step2: Lift off burner grates and detach surface components.

Step3: Unscrew fasteners holding the existing upper plate.

Step4: Carefully remove the plate from the frame.

Step5: Set the new plate in position and align edges.

Step6: Secure it and reinstall all removed parts.