The store will not work correctly in the case when cookies are disabled.
We collect user information to provide a better user experience and protect the security of our website. By continuing to use our website, you acknowledge the use of cookies.
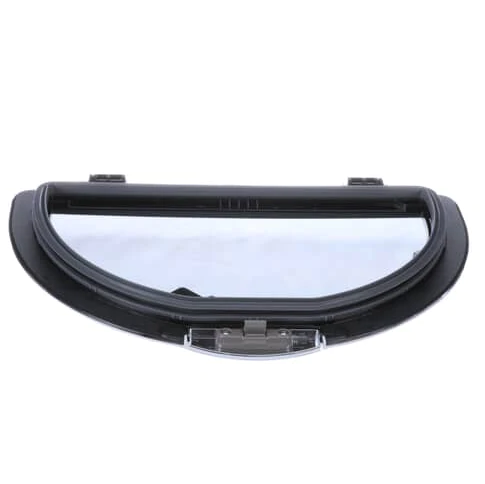
The LG AGM75369503 Washer Lid Assembly is suitable for top-load washing machines and will make the operations run smoothly and for long time. This part fits the washer tub to ensure that water does not spill during washing while enhancing the performance of the cycles. It has a clear construction to enable the users to see the washing process while at the same time being sealed tightly. This lid assembly also promotes safety, increases the rate of washing and the durability of the machine for long time use.
Creates the designated cover for the washer’s upper opening, forming the physical lid structure across the access area. The LG AGM75369503 Service Part Lid Assembly is an OEM replacement that establishes the defined lid configuration across the washer’s upper section while maintaining its intended physical coverage.
Lid Alignment:
Maintains the lid in its intended orientation across the washer’s upper section, keeping its edges arranged consistently with the surrounding top area. This alignment defines the lid’s positional relationship during normal placement without addressing its contact area or closed-position boundary.
Closure Surface:
Forms the designated contact area reached when the lid is in the closed position. This surface defines the physical boundary across the washer opening and establishes the area where the lid meets the surrounding structure without addressing its orientation or positional arrangement.
Replacement Guidelines:
Replacement of the LG AGM75369503 Washer Service Part Lid Assembly may be appropriate when the existing lid is cracked, broken, warped, heavily damaged, or otherwise deteriorated and no longer maintains its intended physical condition. Visible deformation or damage across the lid structure can indicate that the assembly requires replacement.
Common Failure Symptoms:
Cracks developing across the lid surface.
Broken sections around the lid edges.
Visible warping affecting the lid shape.
Uneven positioning across the washer opening.
Gaps appearing along the closed lid perimeter.
Equipment Compatibility:
The LG AGM75369503 Washer Service Part Lid Assembly is intended for compatible LG washers requiring the corresponding lid assembly configuration. Verify the AGM75369503 washer model, lid configuration, assembly requirements, and manufacturer’s parts documentation before purchasing.
What maintenance is required for the LG AGM75369503 Lid Assembly?
Wipe the lid with a soft cloth and mild detergent to remove detergent residue and dirt. Inspect hinges and latches for smooth operation. Tighten loose screws as needed. Proper care prevents misalignment, ensures secure closure, and supports safe washing cycles.
What are common issues with the LG AGM75369503 Lid Assembly?
Lid not closing securely.
Hinge becoming loose or squeaky.
Lid handle is hard to grip or operate.
Noise or vibration during wash cycles.
What are the signs that a washer lid assembly may need to be replaced?
Cracks across the lid surface, broken sections around the edges, visible warping, uneven positioning across the washer opening, and gaps along the closed lid perimeter can indicate that the lid assembly requires replacement.
How can I tell if my washer lid is properly aligned?
A properly aligned lid maintains its intended orientation across the washer’s upper section, with its edges arranged consistently with the surrounding top area.
What should I check before purchasing an LG AGM75369503 lid assembly?
Verify the washer model, lid configuration, assembly requirements, and manufacturer’s parts documentation to confirm that the AGM75369503 corresponds to your washer.
What does the closure surface of a washer lid assembly do?
The closure surface forms the designated contact area reached when the lid is in the closed position, defining the physical boundary across the washer opening where the lid meets the surrounding structure.
Why choose an OEM LG AGM75369503 lid assembly for a compatible washer?
The AGM75369503 is an LG OEM replacement Service Part Lid Assembly designed for compatible LG washers requiring the corresponding lid assembly configuration.
Installation Steps
Step1: Unplug the washer to prevent electrical hazards.
Step2: Open the washer and support the existing lid while removing hinge screws.
Step3: Disconnect any lid switch wiring attached to the old lid.
Step4: Lift off the old lid assembly carefully.
Step5: Align the new lid assembly with the hinge mounts.
Step6: Secure it with the original screws.
Step7: Reconnect wiring if present and test by opening and closing the lid.