
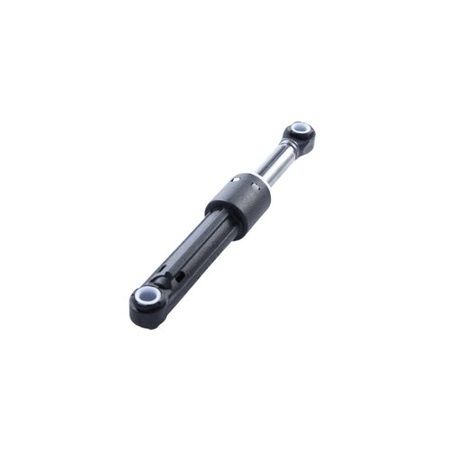
LG ACV72909506 Washing Machine Friction Damper Assembly

Special Price $18.75 Regular Price $24.97
In stock
Available Quantity:   269
SKU
ACV72909506

Product Description

LG ACV72909506 Washing Machine Friction Damper Assembly help to reduce vibration and maintain the stability of the drum. It take up the vibrations produced by rapid rotation and limits the oscillation that occurs in the interior of the machine. It is made of strong material to ensure that it does not cause stress to the structure of the machine and also balances it. It also has a precise damping mechanism that makes it possible to use energy optimally in washing cycles for better performance.
Manufacturer

https://www.hnkparts.com/media/catalog/product/a/c/acv72909506-88839.jpg
Manufacturer Name: LGE
Product Number: ACV72909506
OEM Part Number: ACV72909506
Product Description: Damper Assy-Friction

Choose the best Home Appliance parts and supplies from HNKParts!

  • Same Day Shipping

  • Best Quality And Best Price

  • Wide Range of Inventory

  • Best Customer Service

Have More Questions or Need Help to Place The Order?
Reach us at (866)723-0907 or [email protected]

Write Your Own Review
You're reviewing:LG ACV72909506 Washing Machine Friction Damper Assembly
Your Rating
Customer Questions
What maintenance is required for the LG ACV72909506 Friction Damper Assembly?

Regularly inspect the washing machine friction damper for wear, cracks, or loose connections. Keep the area clean from detergent residue or lint buildup. Proper maintenance ensures smooth drum operation and prevents excessive vibration. Always unplug the machine before inspection for safety.

What are common issues with the LG ACV72909506 Friction Damper Assembly?

  • Excessive vibration during spin cycles.
  • Loud banging or knocking noises.
  • Drum misalignment or wobbling.
  • Reduced shock absorption leading to unstable operation.

Installation Steps

Step1: Disconnect power and water supply for safety.

Step2: Remove rear panel and locate old friction damper assembly.

Step3: Detach mounting bolts and clips, replace with new damper assembly.

Step4: Reassemble panel, restore upright position, reconnect supply, test spin cycle.

Step5: Ensure all fasteners are tight and check damper alignment before use.