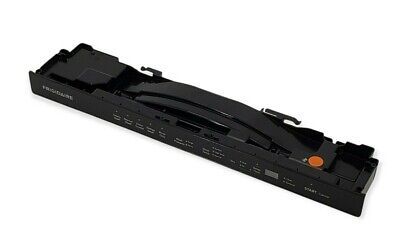
Frigidaire A18195209 Dishwasher Control Panel
Special Price
$153.43
Regular Price
$174.95
In stock
Available Quantity:
93
SKU
A18195209
Product Description
The Frigidaire A18195209 Dishwasher Control Panel provides cycle selections and status indications and sends commands to the control module. User inputs are converted into control signals to turn on the wash, rinse and drain operations. The panel is integrated into the top part of the front section of the appliance door, and it connects to the control board behind it.
Manufacturer