
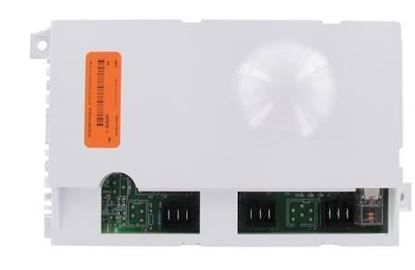
Frigidaire 809160308 Dryer Electronic Control Board

Special Price $219.00 Regular Price $276.44
In stock
Available Quantity:   4
SKU
809160308

Product Description

The Frigidaire 809160308 Electronic Control Board is responsible for controlling and managing the dryer’s main functions for better results. It does this by getting signals from the dryer’s sensors and then sending power to the motor, the heating element, and the timer to make the temperature, drying time, and cycle all correct.
Manufacturer

✓ This Product Replaces: 134706700
https://www.hnkparts.com/media/catalog/product/8/0/809160308_frigidaire_hnkparts.jpg
Manufacturer Name: FRIGIDAIRE
Product Number: 809160308
OEM Part Number: 809160308
Product Description: Control Board

Choose the best Home Appliance parts and supplies from HnKParts!

  • Same Day Shipping

  • Best Quality And Best Price

  • Wide Range of Inventory

  • Best Customer Service

Have More Questions or Need Help to Place The Order?
Reach us at (866)723-0907 or [email protected]

Write Your Own Review
You're reviewing:Frigidaire 809160308 Dryer Electronic Control Board
Your Rating
Customer Questions
What maintenance is required for the Frigidaire 809160308 Electronic Control Board?

Regularly inspect the dryer control board for dust, debris, and loose connections. Keep the surrounding area clean and dry to prevent electrical issues. Avoid moisture exposure, and ensure the dryer is unplugged before handling to maintain safe operation.

What are common issues with the Frigidaire 809160308 Electronic Control Board?

  • Dryer fails to start or respond.
  • Inconsistent or incorrect cycle operation.
  • Display errors or blinking lights.
  • Intermittent power or unresponsive buttons.

Installation Steps

Step1: Cut off the electrical supply and confirm the dryer is fully powered down.

Step2: Open the control console by removing rear or top fasteners.

Step3: Document wiring layout before detaching any connectors.

Step4: Carefully unplug all harness connections from the existing board.

Step5: Unscrew and lift out the old control module.

Step6: Position the new board and fasten it securely in place.

Step7: Reattach wiring to aligned terminals with firm connections.