The store will not work correctly in the case when cookies are disabled.
We collect user information to provide a better user experience and protect the security of our website. By continuing to use our website, you acknowledge the use of cookies.
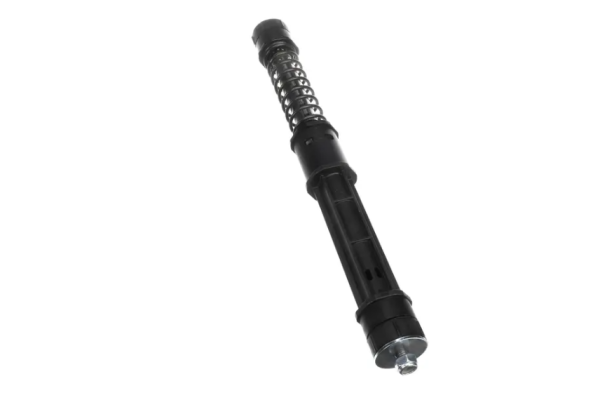
The Speed Queen 803777P Washer Shock Absorber Assembly is used to dampen the vibrations and stabilize the tub during wash and spin. It works by taking the vibration of the inner drum, creating less noise and avoiding over-vibration that would otherwise have an impact on performance. This shock absorber assembly, located between the washer tub and the chassis, is part of the suspension system, and it provides a smooth operation, protection of the internal parts.
Step 1: Prior to initiating the replacement of the Speed Queen 803777P KIT SHOCK ASSY, it should ensure that the required tools are at hand. A Phillips screwdriver, needle nose pliers, and a 1/4 inch flat head screwdriver will be required.
Step 2: The washer's top panel should be lifted and the shock assembly should be found. This component is positioned towards the rear of the washer and is secured to the frame with three Phillips screws. The Phillips screwdriver should be utilized to take out all three screws and they should be placed in a secure location.
Step 3: After the screws have been taken out, the shock assembly should be carefully drawn away from the frame. The shock assembly should detach without difficulty.
Step 4: With the needle nose pliers, the electrical connection should be cautiously detached from the shock assembly by gently pulling it off.
Step 5: After the old shock assembly has been taken out, the new assembly should be grabbed and set onto the frame. The assembly should be fastened in place using the three Phillips screws that were previously removed.
Step 6: The needle nose pliers should be employed to reattach the electrical connection to the new shock assembly. Once it is connected, the connection should be confirmed as secure by gently pulling on the wire to ensure it is not loose.
Step 7: After the Shock Assembly is firmly in place and the electrical connection has been reestablished, the washer lid should be closed and the power should be activated. A short cycle on the washer should be executed and it should be verified that the shock assembly is functioning correctly. If everything appears to operate as expected, your Speed Queen 803777P KIT SHOCK ASSY has effectively been replaced.
Please remember, these instructions serve as general guidance and should always be utilized alongside the manufacturer's manual, if it is available.